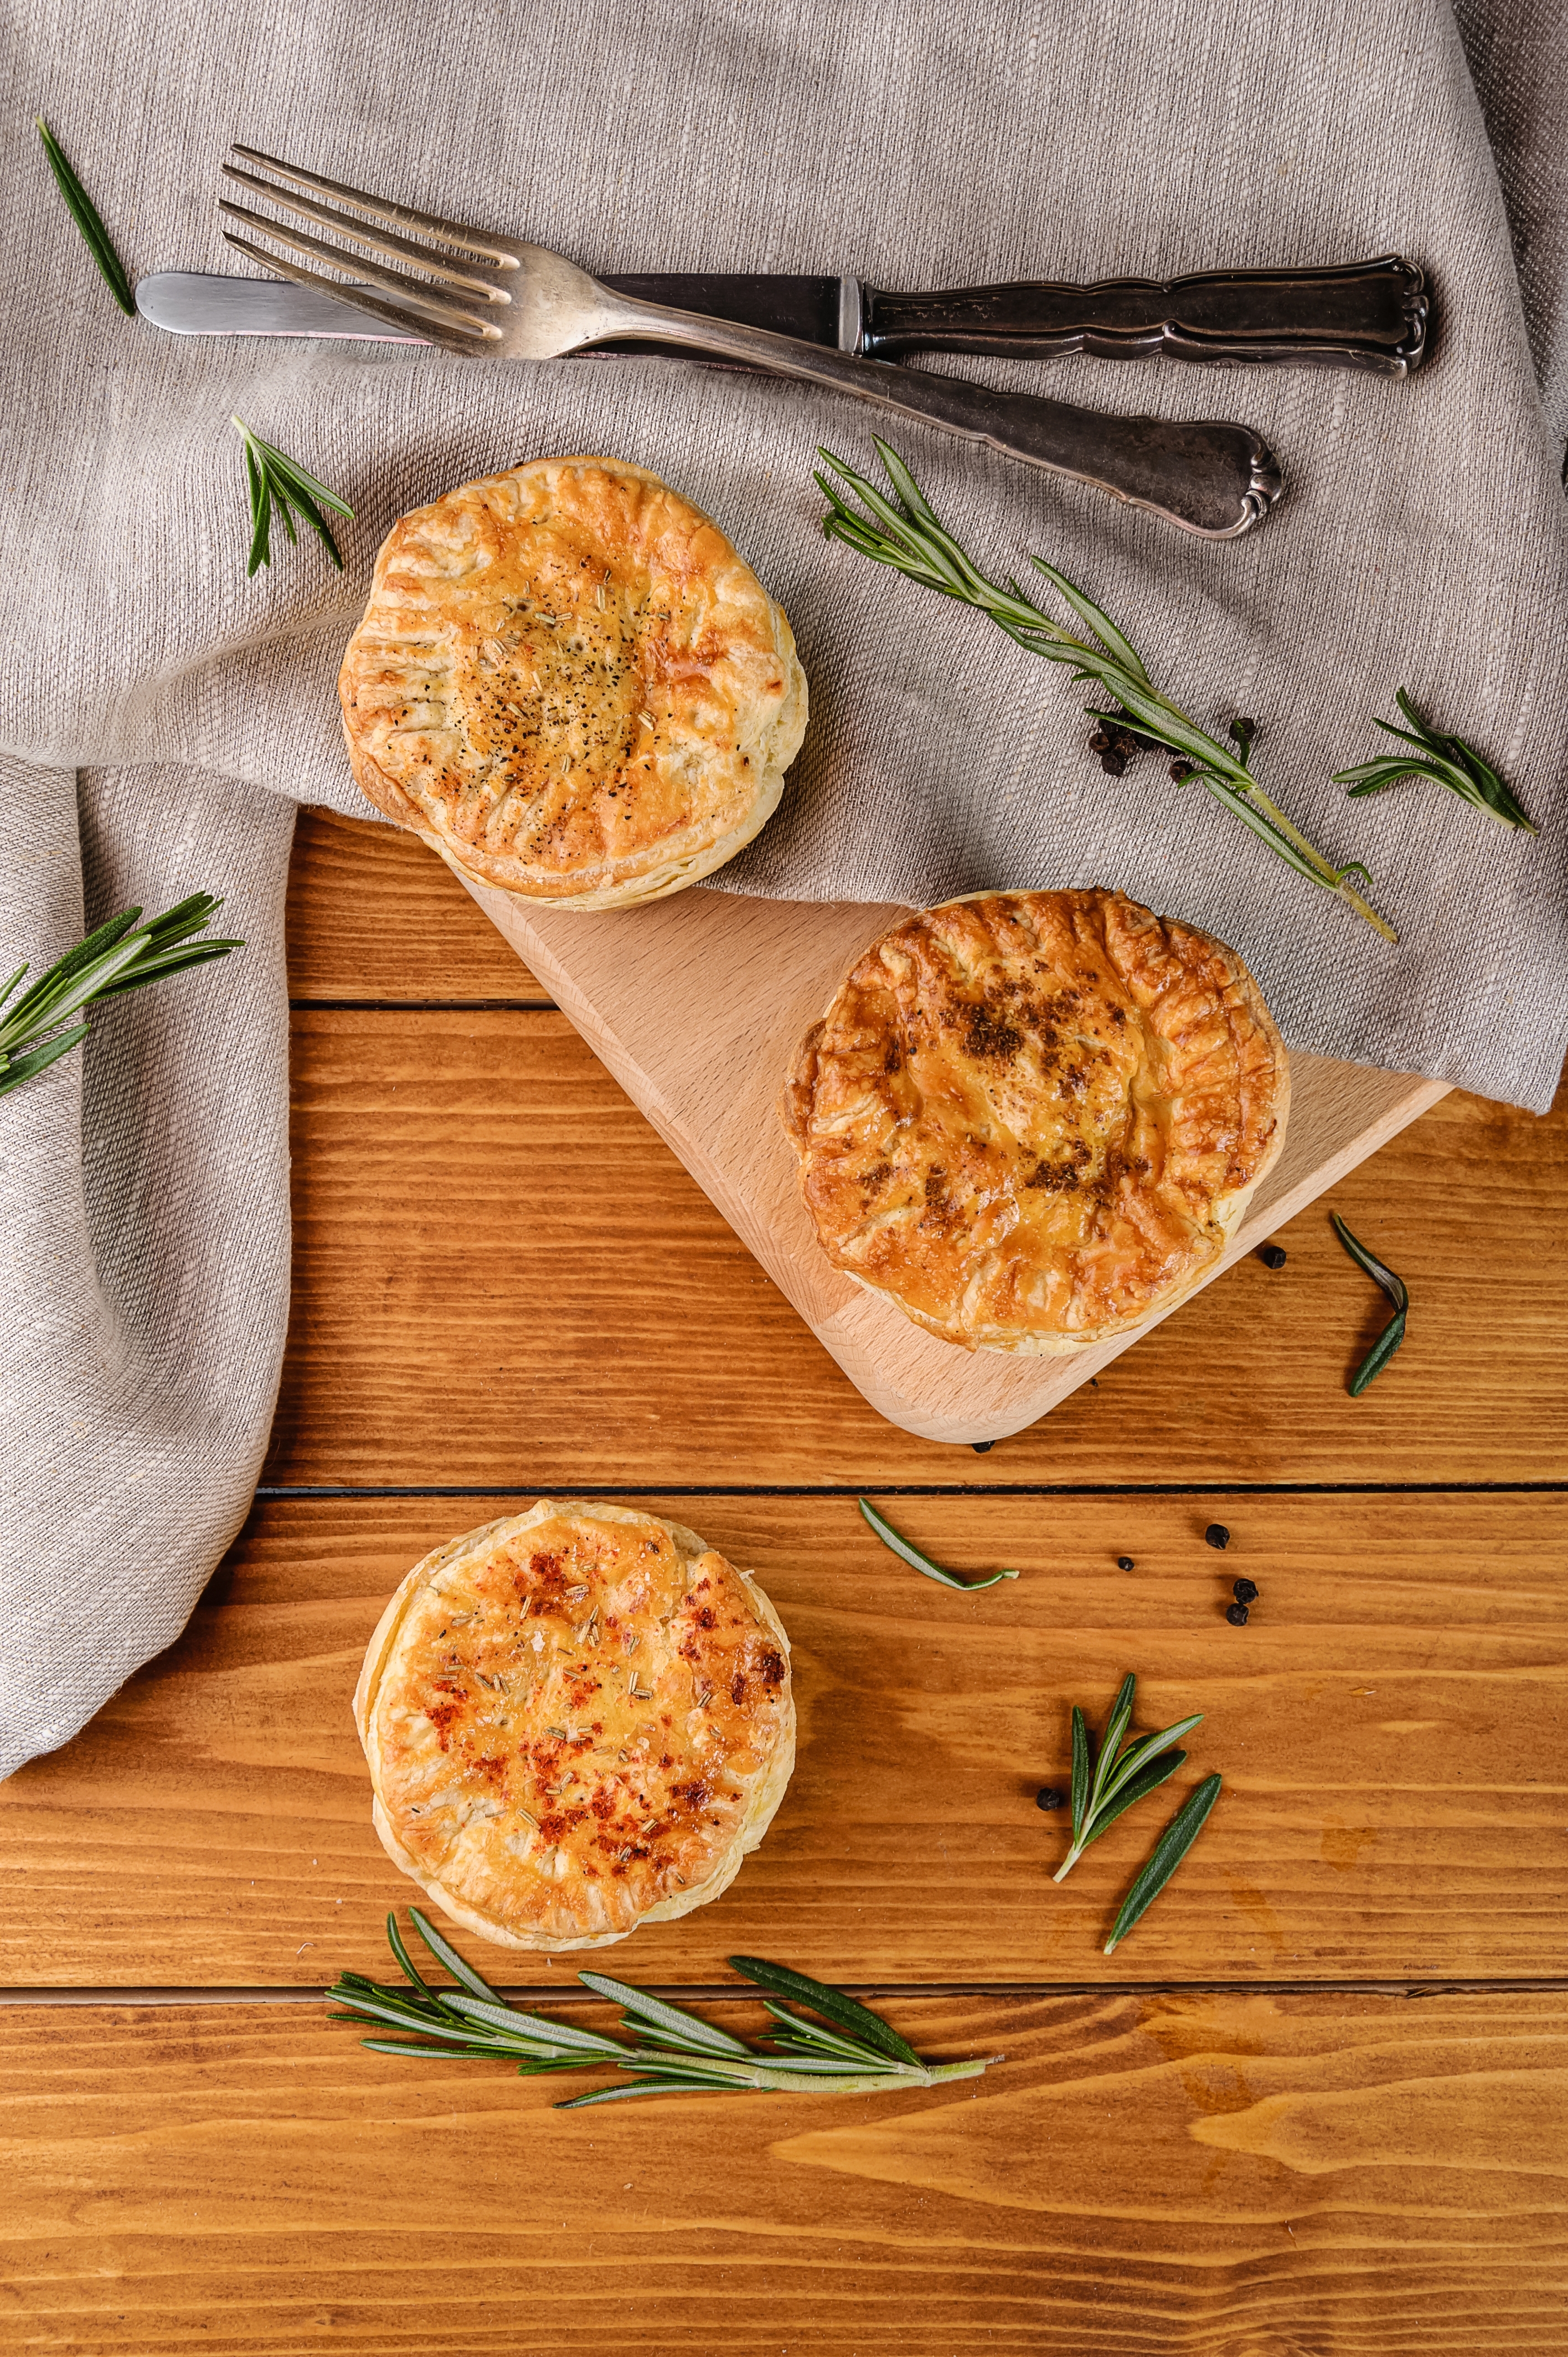
Chicken pot pie is one of my very favorite comfort foods, but it comes with a host of problems. They are hard to make, because, pie, they are really dense so I can (read: should) never finish one, and unless I have a frozen one on hand I am never going to satisfy said craving when I’m actually feeling it. Imagine my delight at discovering this little hack! It’s simple, uses up left over rotisserie chicken if you have it, and all comes together with typical pantry staples so it’s economical as well.
Ingredients:
1 cup diced Rotisserie Chicken or 1 10 oz can shredded chicken in water, drained
1 can Cream of Chicken soup
1 10 oz package of frozen Peas and Carrots
1 can of Pillsbury Grand Biscuits
Salt and Pepper to taste
Preparation:
Pre-heat oven to 375 degrees Fahrenheit.
Prep muffin tin with either a coat of oil or non-stick spray.
Combine chicken, half of the bag of frozen peas and carrots, salt and pepper, and Cream of Chicken soup.
Press one biscuit into each muffin cup and spread it out so that it covers the surface.
Once the crust is prepared, spoon the mixture into each crust base and fill to about 3/4 quarters of the way.
Optional:
You can add cheddar or parmesan cheese.
Pop the tin into the oven and bake for 25-30 minutes. I recommend coating the crust with a little butter to give it a nice brown.
Cool for about 5 minutes, sprinkle with parsley, and Nom On!
Cinnamon buns really piss me off. You see, I am extremely intolerant of sugar. I can never remember if its hypo or hyperglycemia. I just know that two Cosmopolitans had enough sugar in them to knock me out cold sitting in rock hard seats in the nose bleed section outside at a White Zombie/Ozzie Osborne concert on a blustery November night. Oh yeah, that happened.
So you can imagine how much I have to avoid sugar. An interesting problem, since I love to bake. I can enjoy the wonderful smells at least, and the smiles my cookies and cakes give to others. Not so with the smell of freshly baked cinnamon buns. I always break down and eat a half of one. Then I sink into black oblivion, the gooey evidence of my trespass clutched in my sticky hand. If you want to join me there, friends, just follow the cinnamon and cream cheese frosted road…
Cinnamon Buns with Cream Cheese Frosting
Ingredients
2 oz Cream Cheese
3 oz Butter
1 1/2 cups self-rising flour
8 oz Greek Yogurt
1/2 cup powdered sugar
1 1/2 tsp Ground Cinnamon
1/3 cup Light Brown Sugar
1/4 tsp Salt
Preparation
Place butter in a small bowl and microwave for 30-60 seconds, or place in a small pot and melt over low flame. Once its mostly melted, set aside. It will be fully melted by the time you need it.
Add self-rising flour to a medium mixing bowl along with 2 Tbsp of melted butter. Add in the yogurt, 1/4 cup of powdered sugar, and 1 Tbsp of water.
Mix with clean hands until you have a shaggy dough.
On a flat work surface, like a large wooden cutting board or marble counter top, sprinkle liberally with bench flour. Coat your hands liberally, too. Add some more flour to a bowl and keep it handy. You’ll need it.
Turn out the dough onto your work surface and knead into a smooth and slightly sticky ball. You may need to sprinkle the dough with flour or coat your hands a few times during this process. Let the dough rest (being kneaded is hard work, after all) for 5 minutes while you make the cinnamon mixture.
In a small bowl, combine the brown sugar, remaining butter, cinnamon, and salt.
Using a rolling pin coated in flour, roll out your dough into an 8 X 11 oval. Cover almost the entire surface with the mixture. I leave a very thin edge all the way around.
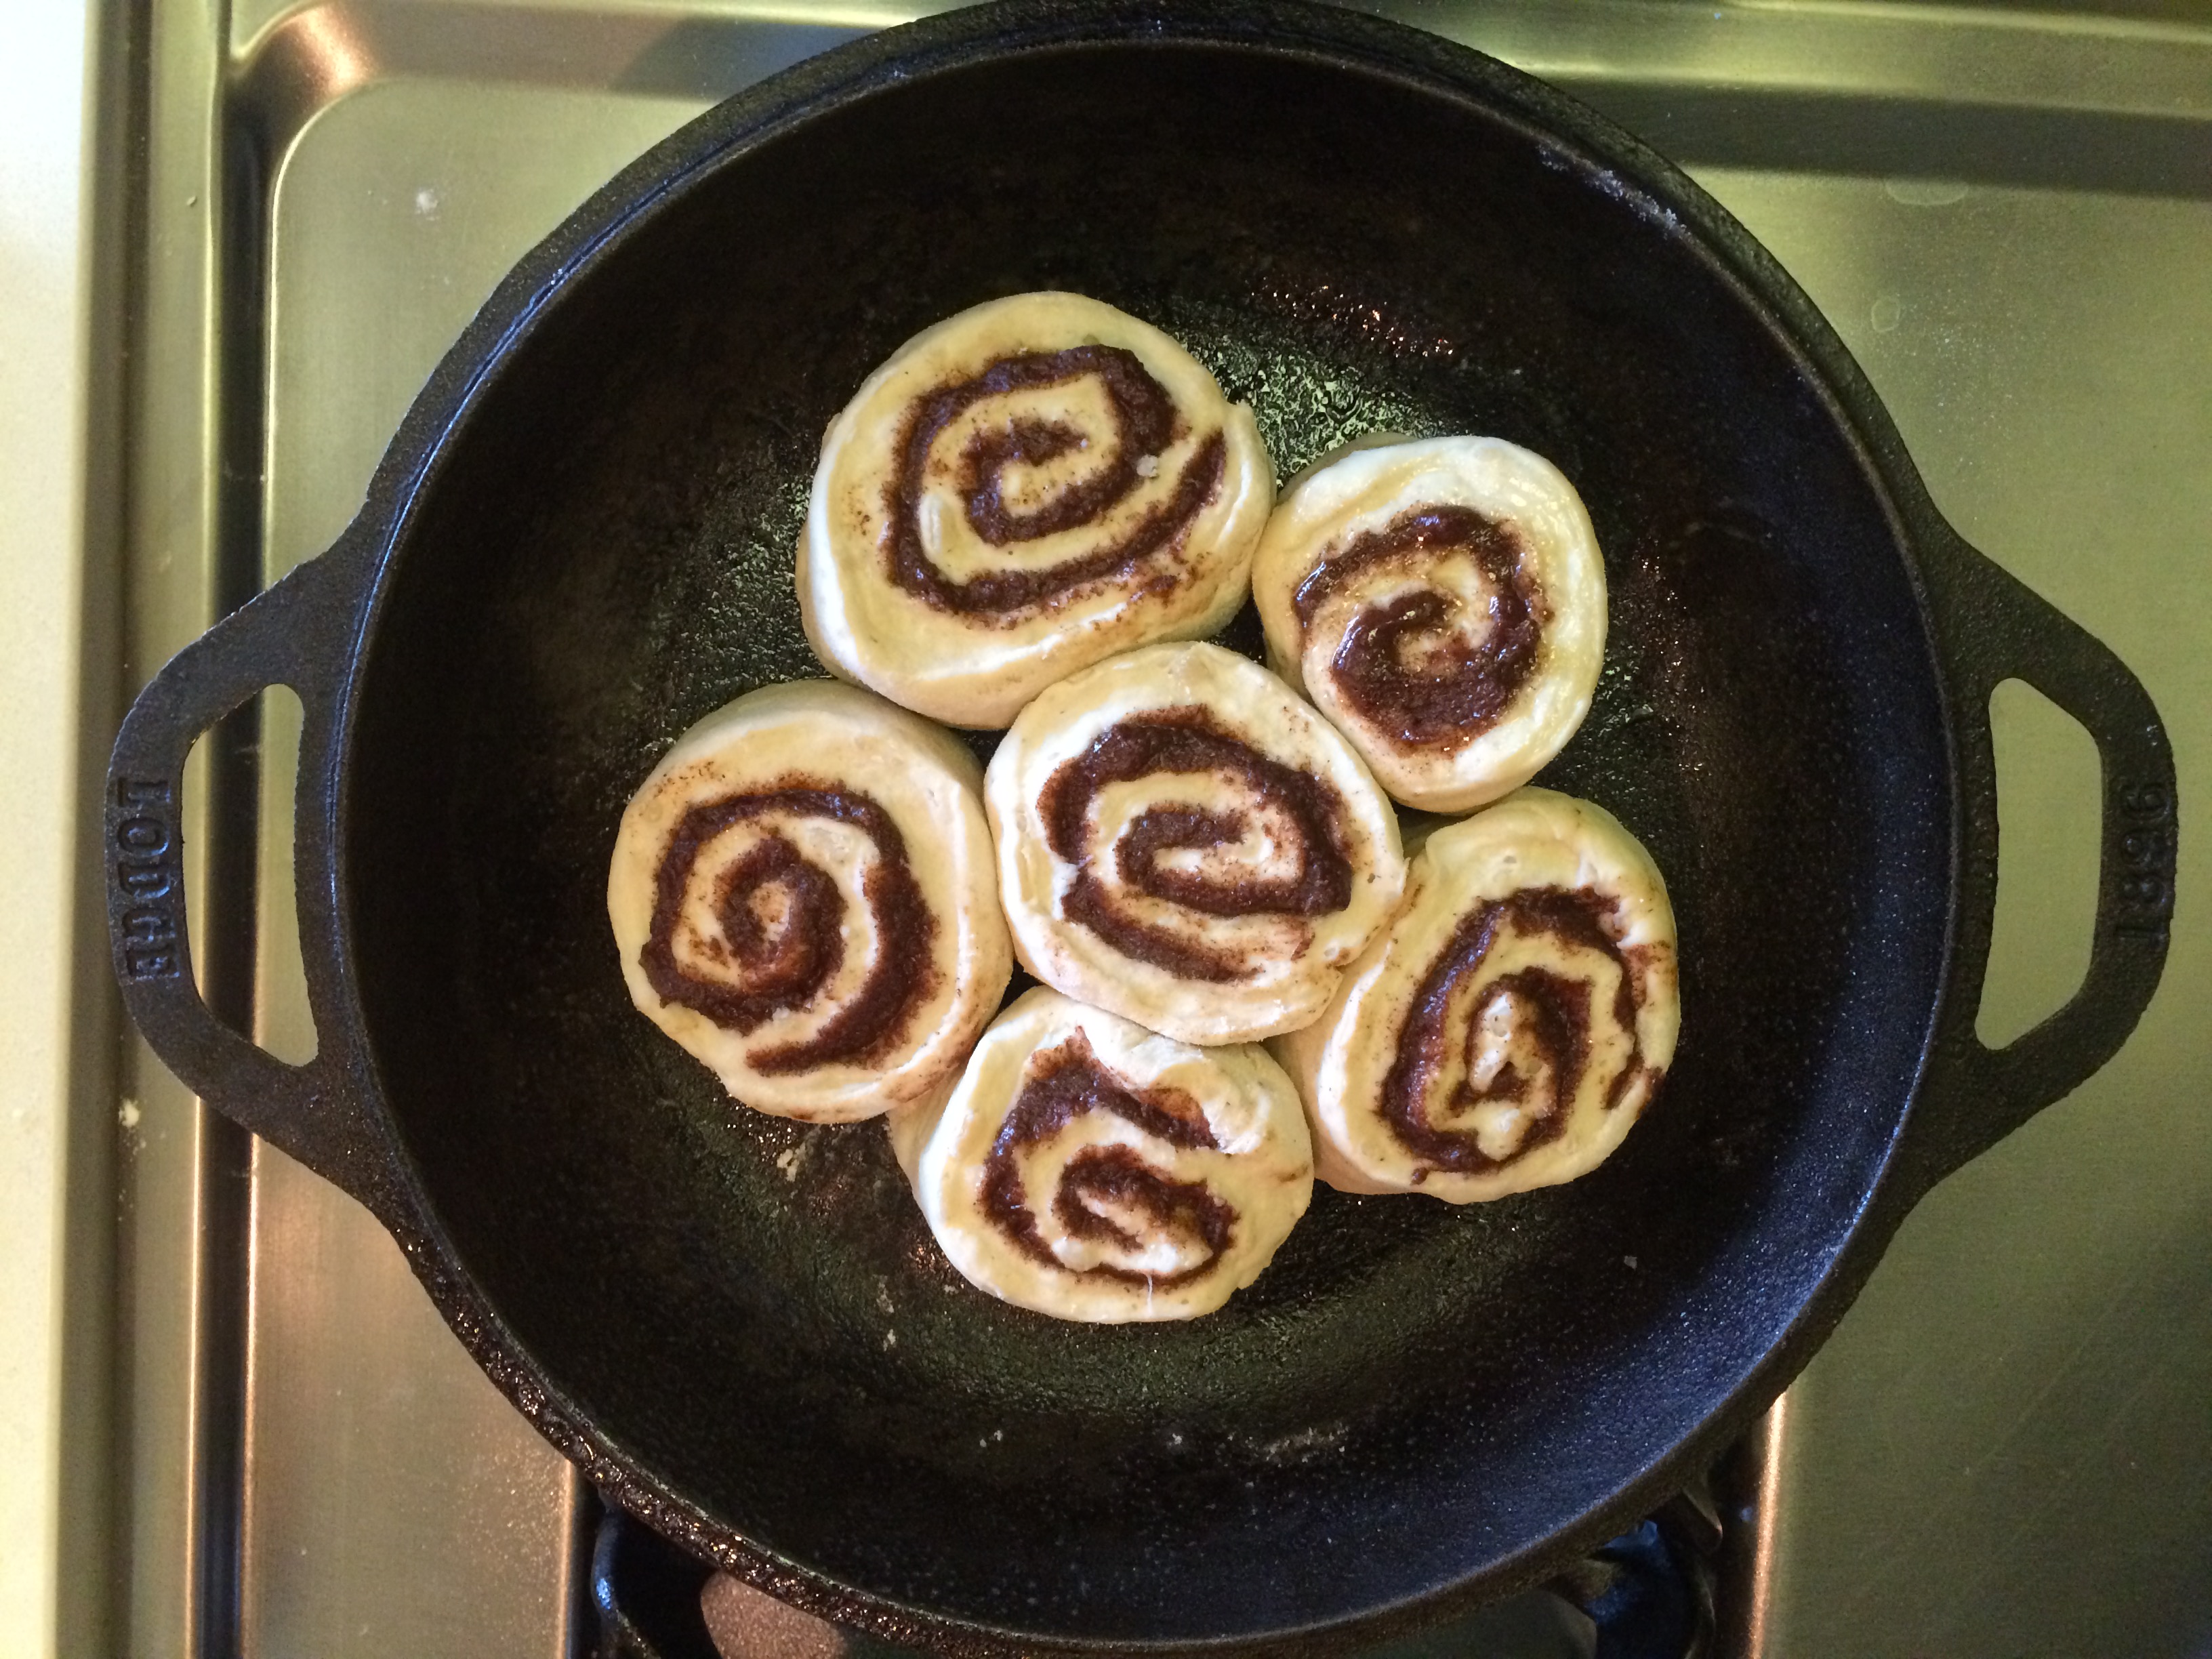
Starting on the short side, roll your dough into a cylinder. Cut into 6 equal slices.
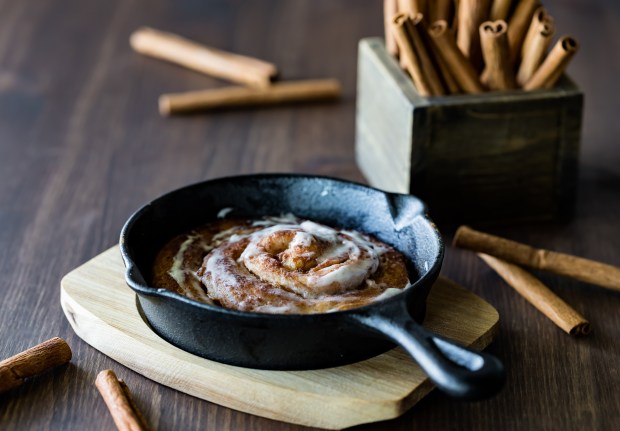
In a round baking pan or cast iron skillet, coat with a little oil or non-stick spray, and then assemble your slices into a tight ring with one slice in the center and the rest surrounding. They need to be snuggly pressed together to ensure the rolls don’t fall open during baking and the dough puffs upwards.
Bake the rolls at 375 degrees for 30-35 minutes. The tops should be lightly brown when done.
While the buns are baking, stir together the cream cheese, remaining powdered sugar, and 1 Tbsp of water. Stir the mixture until smooth.
Once the buns are done, I like to spread the frosting while they are still pretty warm so you get the drippy and gooey effect. If you like your frosting firm, let the buns cool first before you spread.
Ok, so I have posted a previous recipe for the mighty taco el carbon with instructions on how to pack it up for work and save yourself from the daily sandwich miasma. Now that you have mastered that, why not go fusion by making your tacos with shredded chicken smothered in sweet heat BBQ sauce? I’m pretty sure I just made your tummy rumble.
In a small sauce pan, mix the shredded chicken and BBQ sauce together until the chicken is fully coated.
Heat the mixture over a very low flame, stirring often.
In the meantime, heat up a non stick or cast iron skillet and add the olive oil.
Heat up the tortillas until they are warm, soft, and have just a hint of crisp to the surface.
If you are taking this to work for lunch, transfer your tortillas to a plastic bag and seal. Transfer the warmed mixture to tupperware and put the chopped onion and cilantro into a small separate container as well. Whether you warm the mixture up again or not is your choice. If you want to reheat your tortillas just toss the bag in the microwave and heat for about 10 – 30 seconds. Don’t over do it or they will be rubbery.
When you are ready to eat, just assemble the tacos by layering two tortillas, spooning about 2 tbsp of the mixture and sprinkle onion and cilantro down the center.
In case you are wondering why I have no picture for you, it’s because twice I made these, twice I served them to guests to give me feedback on my new recipe with the warning not to eat them all because I still needed a picture, and twice I turned around about 3 minutes later to see an empty plate where my wontons should be.
“Hey!,” I exclaim, “You were not supposed to eat them all before I took a picture!” The individual who swiped the last one chews more quietly, looking anywhere but at me. I sigh, “Never mind, I’ll make another batch later….” Except the spousal unit drank the last of the tequila and the rest of my pineapple went into a pineapple-blueberry wonton so it’s going to be awhile before I make these again. Given how delectable they are, I figured I had better share the recipe before your next party.
Tequila-Habanero Spiced Pineapple Wontons
Ingredients
1 cup pineapple chunks
1 habanero pepper, finely diced
1 cup tequila (The best you can afford)
4 oz cream cheese, softened
1/2 small, red onion, diced
2 tbsp cilantro, diced
1/2 pkg wonton wrappers
1 egg, beaten
Preparation
Finely dice the habanero pepper. Add your pineapple chunks to a small tupperware container and add the tequila and diced pepper. Cover and give the mixture a shake to make sure its distributed. Let the pineapple soak for a few hours. You can even leave these soaking for a few days if you want a stronger flavor.
Once your pineapple is ready, extract the chunks and finely dice them. Set aside.
Place your softened cream cheese in a medium bowl, and using a hand mixer, whip until soft and fluffy.
If you are unfamiliar with whipping cream cheese, start the blades on slow and circle around a few times. The cheese will start to cling to the blades. Put the speed to high and beat against the side of the bowl in a circular motion and the cheese will come loose as it becomes soft and whipped.
Finely dice your onion and cilantro.
Add the diced pineapple, cilantro, and onion to the cream cheese. You should also add in the diced habanero from the marinade. Combine and stir with a rubber spatula until you have a well blended mixture.
Preheat the oven to 400 degrees and lay out your wonton wrappers. Start with 12 wrappers.
Beat your egg in a small bowl and set aside.
Place approx 1 tbsp of the mixture into the dead center of the wrapper.
Use any manner of deep breathing techniques and chanting of ‘a little dab will do ya’ to resist the urge to add larger and larger globs of filling to the wontons. It will look like you didn’t put enough, but I promise it’s correct. The filling expands in the heat and will burst your wonton open.
Dip your finger in the egg and trace around the edge of each wonton. Fold the sides into an X and pinch together to seal.
Spray a little non-stick on a cookie sheet and transfer the wontons. Make sure they are evenly spaced apart.
Bake the wontons for 10-12 minutes until lightly golden and crisp.
Serve immediately.
What do you recommend as a dipping sauce?
I can’t figure this part out. The flavors are so fusion. Do you want spicy? Do you want sweet? Do you want an asian sauce or a salsa? I offered 2 options and what I noticed is that my taste testers had very different preferences when they tried each sauce and then just started popping them in their mouth, sans sauce, at an increasingly rapid pace. Here’s what I made for your experimenting pleasure.
1 part soy, 1 part Sriracha, 1 part sesame oil, 1 pinch sesame seeds
If you want to offer something with sweet notes, maybe you can rock a ponzu? If you try that, let me know how it goes!
Warning: Make sure you hold back one or two wontons before you serve these or you may find yourself lost in a godzilla-like rage similar to what we all feel when someone eats the last spring roll without asking if anyone else wanted it.
A staple starter in pretty much every Italian eatery, and most bar and grilles, I think bruschetta get’s over looked. It’s also really easy to make an utterly underwhelming batch; just use off-season tomatoes and dried basil instead of fresh and you will be one sad Mac. Here’s how to make it right, and then you can put it on everything!
Bruschetta Salsa
Ingredients
As a general note, you should shop for all your fresh ingredients at the farmers market for this dish. Good bruschetta hinges entirely on how vibrant the produce and herbs are. Get your toms, garlic, basil, and parsley from the market the day you plan on making the salsa and choose with care.
4 plum, ripe, in-season tomatoes
1/2 cup shredded parmesan cheese
1/4 cup fresh minced basil
3 tbsp extra virgin olive oil
2 tbsp fresh, minced parsley
3 cloves minced garlic
2 tsp balsamic vinegar
1/8 tsp salt
1/8 tsp pepper
1/8 crushed red pepper flakes
Prep
Combine all your ingredients and let soak and chill in the fridge for about an hour before you serve.
If you want an elegant, low-carb snack or starter …
pick up a log of fresh mozzarella and slice into small medallions. Arrange a few large basil leaves on a plate, then 3-4 medallions. Spoon the salsa over the medallions. If you have time, make a simple balsamic reduction and drizzle a little over the dish. Magnifique!
If you want classic bruschetta toast ….
cut a fresh baguette into thick slices. Spread a little butter on each slice and toast to a medium-well. Getting the slices the right thickness and level of crispy is crucial because the salsa has oil and vinegar and it really soaks through the bread. I can’t tell you how many restaurants have blown this aspect and I am left with a soggy mess and a serious case of situational depression.
I like to add a little leaf of basil to eat slice of bread before I spoon the mixture on. It adds color and a pop of freshness, plus it helps slow the pace of the bread soaking and breaking down. If you think the toast will sit awhile because you are setting it out for a gathering, I recommend this.
Again, if you have time to make a quick balsamic reduction, drizzle this on as a finishing touch. Don’t get carried away though. It’s a strong flavor.
What else can I do with this lovely salsa?
Man, it’s almost endless. The salsa is the flavor so if you want a quick, light vegetarian entree, top off some angel hair pasta and drizzle with balsamic reduction. You can make the dish heartier with slices of grilled chicken.
If you want low-carb, grill chicken breasts or flank steak in a garlic butter and sauté some squash. Top the meat with the salsa and serve with a dollop of balsamic reduction on the side for dipping.
Want a fabulous vegetarian burger? Grill up a portabella mushroom, top with a fat slice of mozzarella cheese and the salsa. Serve on toasted wheat buns with garlic butter. Or, if you want to try something fun, make garlic bread and use two thick slices of that for your bun. Dude.
If you aren’t ready to nom on at this point, you may be hopeless!
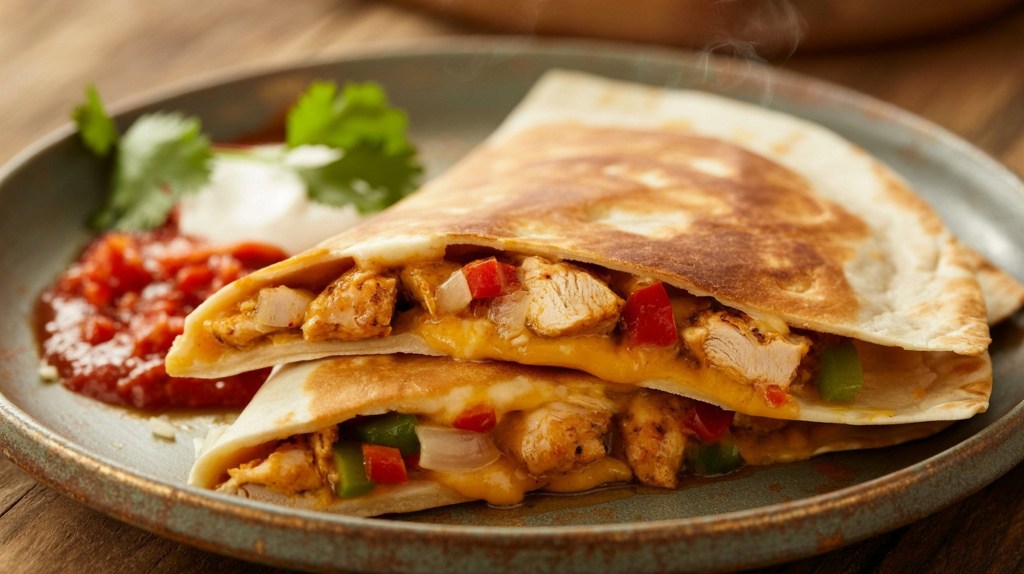
Oh lord, it’s Saturday afternoon again. The whole family is milling around, wanting lunch and a stack of sandwiches just sounds so….weekday sad. The errands are done and maybe you have a little more time to cook than usual. You look in the fridge and see a bunch of random, almost used up stuff like chicken breast, deli meat, and a couple hunks of cheese. I keep a stack of corn tortillas handy to handle Saturday afternoon, because nothing uses up leftovers and delights the palate like the quesadilla flight!
The Quesadilla Flight
Ingredients
Cheese – any kind, seriously. You can use cream cheese, too. I find jack or mozzerlla to be the most-kid friendly, so if you have that, use it.
Filling – empty your fridge of things like the tomato and avocado that are close to spoiling, the almost empty tub of deli meat, that lone left over chicken breast, the ubiqutous 1/2 onion … you get the idea. These all sound obvious but you can use up squash and that 1/4 jar of spaghetti sauce, too. Corn tortillas are one of the most versatile canvases ever, so don’t assume your flight has to only offer the more classic Mexican cuisine flavors.
Corn tortillas – they are healthier, tastier, and less caloric than flour. They are also smaller in size and maximize your number of canvases to make your combos. You’ll see.
Extra virgin olive oil
Preparation
Thinly slice veggies or finely dice whole pieces of meat such as chicken breast or pork tenderloin. Thinly sliced or finely diced ingredients cook better in quesadillas.
Shred your various cheeses and, depending on how compatible the flavors of the cheese, either keep them seperate or blend them. For examle, jack, cheddar, and mozzerella can be blended. Gouda usually can’t pair unless you have another nutty or smokey cheese like gruyere left over also. If you really want to up the diversity of your flights, don’t combine cheeses.
Let the crazy begin! I just go with flavors and pairings that I know to go well together based on what I have to work with. Cheddar, ham, and tomato slices. Pepper jack, turkey, and avocado slices. Cream cheese with tomato and olives. Jack with shredded chicken, diced onion, and cilantro. If I have nutty or smokey cheeses to use up, I add thin apple slices and some sauteed onions. Some cheeses pair well with pesto or berry jams, and of course if you have left overs from spaghetti night, just do a thin smear of tomato sauce, mozzarella, ham, and olives.
To cook the quesadillas, just put your pan over a medium-low flame and add a litte EVOO. Place the tortilla into the pan and rub around to coat. If using sauce, spreads or jams, spread that first. Then, sprinkle the cheese and then layer meat and then veggies. I let the cheese melt a little and then fold the tortilla over. You just want to cook each side to lightly brown and get the cheese gooey.
Repeat with various combos, based on your ingredients. I generally end up with quite a variety, even in I just omit an ingredient here or there or sub another. The goal is to make a flight, so they shouldn’t all taste just the same.
Serve with dips, lime or lemon wedges, or extra tomato slices dusted with salt and pepper. A little side salad if you have it handy.
Note: These guys get cold fast, so I am basically a short order cook. Serve as batches are ready and encourage your peeps to dig in. As Chef, you should be nomming as you cook. For this reason, I don’t make the same quesadilla twice in a row or your batches won’t be ‘flights.’
Dips to serve with my flights?
Before you warm up the griddle, you can make these easy-prep dips before you start the flights.
Quick Guacamole Dip
Ingredients
2-3 Ripe avocados, cubed
1 or 2 Roma tomatoes, chopped
1/2 Red onion, coarsely chopped
2 to 3 Garlic cloves, roughly diced
Fresh squeezed juice from 1 to 1 1/2 Limes
Salt and pepper, to taste
Ground cayenne, to taste
Cilantro, ripped or roughly chopped
Preparation
With a fork, mash and stir the avocado. You can leave it a little chunky; it’ll get smooth as you mix in your spices.
Fold in the tomato, onion, diced garlic and stir.
Squeeze in the lime juice and stir.
Add in about 1/4 tsp of salt and 1/8 tsp black pepper. Stir and taste.
Add in a few shakes of cayenne. Stir and taste.
If your guacamole seems bland, you can add in a little more salt or cayenne, but don’t go too crazy. Ground spices are more potent than freshly chopped peppers so the taste changes quickly.
Cover with plastic and chill for 30 minutes.
When you serve, sprinkle a little cilantro on top.
Spiced Sour Cream Dip
Ingredients
1 tbsp olive oil
1/2 cup yellow onion, chopped
1 cup sour cream
Salt and pepper, to taste
Ground cayenne, to taste
Preparation
In a small pan, heat up a tablespoon of olive oil.
Add in a half cup of chopped yellow onion and sauté until they are clear and soft.
In a small bowl, mix 1 cup of sour cream with a pinch of salt and a pinch of cayenne or black pepper.
It’s 7 am and you are standing in front of the fridge, feeling underwhelmed about your lunch options. Left overs? Meh; too much gravy. Sam’ich? Meh; too boring. That sad looking prepackaged salad you stock for lunches? Meh; you’re always still hungry after. Cup o’noodles? Eww; icky, bloated, sodium-belly. What you need is something you can make quickly, cheaply, is fairly healthy, and well, good enough to eat on purpose!
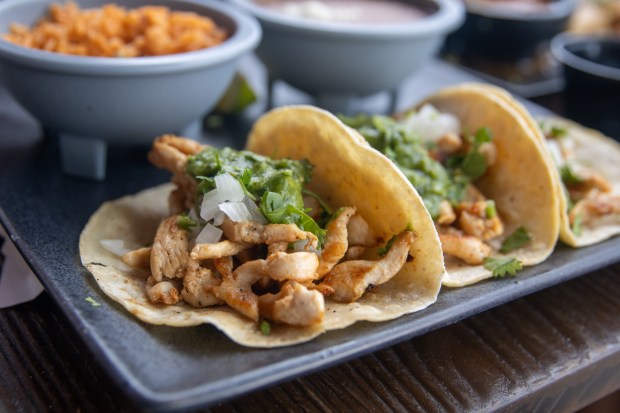
Enter the street taco. Traditionally it’s a Taco el Carbon, which loosely translates to ‘grilled over an open coal flame,’ but lots of food trucks and Mexican caterers sell these without the fuss of flame grilling. I’ll show you how to make this in a way that will have you out the door in 10 minutes with a lunch that packs up well, comes together when it’s time to eat so it tastes freshly prepped, and will save you from carrying around sad taste buds all afternoon. You’re welcome.
When the chicken is ready, dice the small onion and chicken. If you have the time, I think shredded chicken tastes a little better, but dicing is traditional and faster.
Roughly chop or tear some cilantro, ‘to taste,’ which is jargon for ‘use as much or as little as you like.’
Combine all the ingredients into a tupperware and seal.
Over an open flame, lightly grill your corn tortillas. I like mine with just a few minor char spots, but don’t over do it. You want the tortilla to stay soft and pliable.
When your stack of tortillas is done, roll them loosely and pop into a plastic sandwich bag. The steam will keep them soft.
When you are ready to eat, you really don’t need to re-heat anything. Just sprinkle the mixture into each tortilla and keep your moans of pleasure down so you don’t get any co-workers asking for sharzies. If you are a fan of taking checks with your mouth that your stomach can’t cash, make a batch of this Salsa Roja as a garnish.