Carrot Cupcakes: Ohhhh yeah…..

Ah, carrot cake… Is there anything better? All you people with your red velvet and cheesecake obsessions need to take this dollar I’m holding down to the corner and buy yourself a clue. But then, if you make a cake you have this behemoth darkening your fridge. The solution? Well, it’s me so I think the solution is always found in a cupcake pan.

Carrot Cupcakes

Ingredients:

For the cupcakes….

  • 2/3 cup grapeseed oil
  • 1 1/2 cups grated carrots
  • 1 cup flour
  • 3/4 cup sugar
  • 1 teaspoon cinnamon
  • 1 teaspoon baking soda
  • 1/2 teaspoon baking powder
  • 1/4 teaspoon salt
  • 2 eggs, beaten

For the not-too-sweet frosting ….

  • 4 ounces cream cheese
  • 4 tablespoons butter
  • 2/3 cup powdered sugar
  • 1 teaspoon vanilla
  • Nutmeg

Preparation:

  • Wash and skin the carrots. Grab a cheese grater and put on a good audio book while you grate the carrots. If you have one of them fancy food processors, you can use that and save time. I like to save to save space, thus the audio book.
  • Pre-heat the oven to 350 degrees.
  • Once the carrots are grated, combine them in a small bowl with the oil.
  • In a large bowl, combine all the dry ingredients. Make sure you don’t add the eggs.
  • Now, with the dry ingredients mixed, fold in the carrot-oil mixture and take care not to mix it much. You want the batter folded, not mixed.
  • Beat the eggs separately and then fold those in, too. Stir the eggs into the batter just a little, 10-15 swipes of  your spatula.
  • Line a 12-cup muffin pan with cupcake liners and then, using an ice cream scoop, divide the batter evenly among the muffin cups.
  • Bake for 13 minutes or so. They should be spongy on top and a golden-brown color.
  • Once baked, allow the muffins to cool.
  • Mix your frosting ingredients in a medium-sized bowl and beat at medium speed with a hand-mixer, until light and smooth.
    Note: If you cream cheese is a sticky mess in your mixing blades, turn the speed up and rove around the edges of the bowl. The speed will free the mixture from your blades and get it nice and smooth.
  • Using a rubber spatula, transfer the frosting into a plastic sandwich bag and snip off one edge. Pipe the frosting onto the cupcakes and lightly dust with nutmeg.
  • Hand off the mixing blades to your clean up crew, as available.

Clean up crew

Serve at room temperature, or you can refrigerate them for a few minutes if you want the frosting to be a little firm.

Be prepared to make these often, as they are seriously delicious. I don’t have a big sweet tooth, and thus I modified the original recipe I found at Pinch of Yum to be a more balanced and mildly sweet cupcake. I finally had a proper dessert that kept me coming back for more. If you do like really sweet stuff, just up the powdered sugar in the frosting to 2 cups and call your dentist.

Nom on,

~Crunchy

Salsa Verde

So, you like Mexican food, but maybe you are getting a little burnt out on that red tomato flavor? Enter the verde! This is a great sauce that you can use for just about any dish you would normally garnish or make with a salsa roja or ranchera sauce and get a great, new taste. It’s easy to make and way more flavorful than the crap sold in cans in the “stuff non-white people eat’ isle. Give it a try, you’ll be pleased.

Salsa Verde

Ingredients

  • 1 pound tomatillos
  • 1/2 large, white onion, chopped
  • 1-to-2 Serrano chili peppers, chopped
  • 1 garlc clove, minced
  • 3 tablespoons fresh cilantro, chopped
  • 1/2 teaspoon ground cumin
  • 1 1/2 teaspoon salt
  • 1/2 teaspoon pepper

Preparation

  • In a small sauce pan, add tomatillos, onion, peppers, and cilanto.
  • Add enough water to just cover the veggies, about 2 cups.

Salsa Verde Progress

  • Add cumin, salt, and pepper.
  • Bring to a boil and simmer for 20 minutes.
  • Using either a blender or, ideally, an immersion blender that you can stick right in the pot, puree the ingredients.
  • Taste the salsa and add a little more salt, a 1/4 teaspoon at a time until you are happy.

What can I do with my salsa verde?

This sauce is great to use for enchiladas and casseroles, especially if you are looking for an alternative to ranchera sauce. You can also garnish tacos and rellenos, or make a wet burrito by covering in a generous amount of sauce, sprinkling with jack cheese, and baking at 325 degrees for about 5 minutes. You just want the cheese to melt.

If you like to grill, you can use this sauce as a marinade for chicken or garnish on shrimp. The cumin in the sauce makes it very robust so it can stand up to any cut of steak as a garnish, too.

If you are into creative pizzas, you could use this sauce instead of tomato, add slices of cooked steak, chopped white onion, and chopped tomatoes with shredded mozzarella or jack cheese. Sprinkle with cilantro when its out of the oven. Damn, I am making myself really hungry.

Feel free to check out my recipes using salsa verde if you are looking for ideas.

Nom On,

~Crunchy

The Verde Burger

This weekend I went on a salsa-making rampage. This led to the need to use it and thus The Verde Burger was born. I call it The Verde because it is full of tasty green things – a thick turkey patty stuffed with avocado and diced jalapeño and drenched in freshly made salsa verde, which, of course, gets its color from the tomatillos and Serrano peppers used to make it. Add slices of Monterey jack cheese and juicy beefsteak tomato, and you got yourself a party.

The Verde Burger

Ingredients

For the patties

  • 1 pound ground turkey
  • 1 jalapeno, diced
  • 1 large, ripe avocado, cut into small chunks
  • 1 clove of garlic, chopped
  • 1/3 cup panko bread crumbs
  • 1/2 teaspoon salt
  • 1/4 teaspoon pepper

For the rest

  • 4 onion hamburger buns
  • 1 large beefsteak tomato, cut into 4 thick slices
  • 1/2 cup salsa verde, prepared in advance

Optional fixings

  • 4 leafs of romaine or other leafy, dark green lettuce
  • Thin slices of red onion
  • Roasted pasilla pepper fillets

Preparation

  • Heat up your grill – cast iron griddle, George Forman electric grill, or outdoor grills all work just fine.
  • Combine all the ingredients for the patties and form into 4, thick burgers.
  • Grill the burger patties.
  • Layer the bun with a slice of tomato, the patty, and smother in salsa. You can add your optional garnishes next, if using.

How do I get the perfect burger?

  • Flip the patties only once so each side gets browned.
  • DON’T PRESS on the patties or otherwise fiddle with them beyond the one flip. You will lose all the juices.
  • Don’t overcook. 155 – 160 degrees internal temp is enough. They will finish cooking as they rest.
  • Add your cheese slices right before you remove the patties from the grill. They will melt from the internal heat and not become rubbery or overly melted this way.

I dedicate this burger to Kermit the Frog. It’s not easy being green, but at least he’s got color- coordinated eats.

Nom On,

~Crunchy

Chile Rellenos: Fried batter goodness

I think it’s safe to say that we all have our favorite dishes from any cuisine. And no matter how complicated and labor intensive it is to make it on our own, we anoint the dish worth the effort to learn. On this particular weekend, I decided that dish would be the Chili Relleno. After god knows how many hours, and god knows how many glasses of wine (I refuse to believe the wine delayed the process one bit,) the end result was stinging eyes, possibly a chili seed that got in my nose from itching it, a sense of pride, and a fully-bellied nap afterwards meant for the gods. It’s called, winning!!

Chile Rellenos

Special Equipment

  • Cast Iron Skillet

Ingredients

  • 12 pasilla or Anaheim peppers
  • 1 pd block of jack or pepper jack cheese
    • *Note: If you have a smoked cheese, this is the time to use it. Some basic grocery stores sell habanero pepper jack and farmers markets often have cheese merchants that sell some amazing smoked cheeses.
  • Grapeseed Oil
  • 1 cup milk
  • 1 cup flour
  • 1 egg
  • 1 tsp baking powder
  • 1 tsp baking soda
  • 1 tsp salt

Preparation

  • Roast chili peppers

There are a few ways to do this. You can either brush the peppers with olive oil and roast them under the broiler, you can put them in a cast iron skillet or on a cast iron griddle, or you can put them right on the burner. The goal is to char the skins and get the peppers soft and flaccid. ( Heh, heh, she said ‘flaccid.’)

Roasted Peppers

When the chiles are done roasting, put them in a plastic bag to steam for a few minutes. If you don’t have time to finish the project you can actually leave the peppers in the bag until you are ready to make your rellenos.

Steamed Chiles

  • Slice a small opening into the chiles and scoop out the seeds. Using a paper towel and over the sink with the facet trickling, scrap the chard skins off the peppers.
  • Cut the 1 pound of cheese into 12 strips of equal size.
  • Stuff each pepper with a slice of cheese and close them up.
  • Mix the egg, flour, milk, baking soda and powder, salt and pepper and whisk with a fork. Sprinkle flour on your cutting board or prep surface.
  • Pour a fair amount of oil into your skillet, up to 1 inch and heat over a medium-high flame. (Personally, I don’t like cooking with that deep an oil bath because it splatters like crazy and is wasteful. I don’t cook with cheap oil, so I pour enough in to make about 1/4 inch bath and it browns the batter just fine.)
  • Now comes the tricky part. With your skillet oil slightly smoking, take a stuffed pepper and roll it in flour, than dip into the batter. Place the gooey, dripping mess into the oil and fry. Using tongs, each side only needs a minute or less, so roll as gently as you can to brown all sides of your relleno.
  • Once all the batter is fried, use tongs and transfer to a plate. Repeat that exact process with each of your peppers.
  • Once you have all your peppers fried, you may need to pop them in the microwave for just a few seconds to make sure that cheese is melted inside. This will depend on how thick the slices of cheese were that you stuffed the peppers with and how deep an oil bath you used.

How do I garnish and serve the rellenos?

Ok, this dish is popular all over central and south America and garnish styles do vary. If you are used to eating your rellenos served drenched in a mild ranchera sauce, you can certainly do that. I have had them that way, sometimes baked with a little cheese on top of the sauce. I have had rellenos served almost as a soup, the tomato sauce more a delicate broth than a sauce.  However, there are some communities that serve the dish plain and offer salsa roja or salsa verde and maybe a little sour cream to garnish as you see fit. I recommend you try it WITHOUT a sauce bath at least once because they are amaze-balls.

Try to eat your fill of rellenos BEFORE you look over at the disgusting, oil-splatter, batter-drip-covered nightmare your kitchen has become. It will bolster your spirits for the clean up job ahead. Or, if you have kids of chore-doing age, make those little punks deal with the mess while you take a nap and really give all that cheese and batter carte blanche access to your thighs.

Nom On,

~Crunchy

Salsa Roja de Chile de Arbol: Guadalajara’s secret sauce

It’s years back, my waistline was drastically smaller, and my husband, also skinnier, was still a boyfriend. We are at his mother’s house and I see 5 brown faces staring at my pasty, white one with a mix of anxiety and that smile we get when we are expecting to burst out laughing at any moment. A torta stuffed with beans and pork and completely drenched in this neon red sauce sit before me. Behold, the tortas ahogadas, a Guadalajarn treasure most anglos who call themselves Mexican Cuisine aficionados never even hear about. Only Alex’s mom, Maria, doesn’t look like she is going to laugh. She looks terrified because I told her not to hold back, but to drench the torta in the salsa roja as was the tradition. “I can handle it,” I promised.

Now was the moment to demonstrate my spice-eating chops. I cut off a big, heaping chunk of torta, the crowd draws a breath, and I chow down. I close my eyes as all sorts of awesome stuff starts happening in my mouth – heat and savory and, and … holy shit THAT’S HOT! I immediately grab my beer and suck down half of it in two gulps, getting an instant buzz. I look at the crowd with a big, dopey smile on my face and go back for more. ‘I can’t believe you can eat that!’ proclaims Alex’s younger brother, Jorge. ‘I just eat it with tomato sauce!’ I smile at him. “Well,” I say, “That settles it. I am more Mexican than you.”

It’s taken me years of experimentation and some coaching from Maria, but I am ready to share this amazing salsa with you. If you want to make it for dunking tortas, you will want a more watered down version of this, but otherwise it’s a great way to add heat and flavor to any dish that you want a salsa or hot sauce for. Buen provecho!

Salsa Roja de Chili de Arbol

Salsa Roja de Chili de Arbol

Ingredients

  • 30 dried chili de arbol peppers (located usually in the aisle with all the hanging bags of dried Mexican spices and specialty items)
  • 2 cups of water
  • 1 garlic clove, peeled and quartered
  • 1 8 oz can tomato sauce
  • 2 tsp vinegar
  • 1/2 tsp salt
  • 1/4 tsp pepper

Special Equipment

  • Blender or food processor
  • Fine mesh strainer
  • 1 corn tortilla

Preparation

  • In a medium pot, add water and dried chili peppers. Bring the water to a boil.
  • Boil the peppers for 5 minutes.
    • *Note: Rehydrating these extremely spicy peppers expels oils into the air that agitates eyes, nose, and throat. Turn on the vent fan and open the windows/doors. Babies and toddlers are especially annoyed by these fumes, so if you have the option to keep them in a different part of the home, that’s helpful. I have a tendency to prepare dishes that require broiling or dehydrating chili very early in the morning when everyone is asleep.
  • Turn off the flame and cover the pot with a well fitted lid. Let the chilis soak for about 20 minutes.
  • Add the chilis and about 1 cup of the chili-infused water to a blender. You can use a stick food processor in a large, plastic measuring cup too, if that’s handy.
  • Cut the garlic into quarters and toss in to the blender, along with the can of tomato sauce and vinegar.
  • Blend the ingredients together. Add 1/2 tsp of salt and pepper and blend a bit more.
  • Grab the corn tortilla, tear into shreds and taste. From here, you will want to keep adding salt at 1/8 tsp at a time, blending, and tasting until you are happy with the heat and flavor.
    • *Note: The bland corn tortilla will help you discover the right salt ratio to achieve the flavor you find appealing. If you use a salted chip for your taste test it will mislead you.
  • Place the fine mesh strainer over a measuring cup and add the sauce in batches. Using a spoon, press down on the seeds and pulp to push the liquid through. You can either save the seeds and pulp to make another dish with the spicy chili paste, or discard.

If you are really a spice fanatic, serve the salsa unstrained and you can eat with chips, but I think most will enjoy this as a garnish on tacos, quesadillas, chili, even a dollop in their soup if they want some kick. It’s sure to become your new favorite hot sauce.

Nom, with sizzle, on,

~Crunchy

The Perfect BLT: Bacon loves tomato

I don’t know what it is about a BLT that just screams perfection, but they can do. You see it on the menu or realize you have some tomato in your veggie drawer about to go to wasted veggie heaven so you think BLT…. and it’s super lackluster. The promise of simple greatness is there, your current sandwich stinks though. Like all simple dishes, it comes down to ingredients and prep. Let me show you the way; bacon loves tomato.

Perfect BLT

Ingredients

  • Onion Hamburger Buns or Onion Deli Rolls – the fatter and fluffier, the better
  • Thick cut Bacon – if a package has more than 9 slices, its false advertising
  • Ripe Beefsteak Tomatoes – squishy and ready to explode from the farmers market is best
  • Leafy Green Lettuce – Iceberg is watery and flavorless, so use it only if you can’t get romaine or any other dark green, leafy lettuce
  • Mayo or Miracle Whip
  • Salt and Pepper

Preparation

  • Either pan-fry or bake your bacon to about 155 – 160 degrees. Let rest.
    Note: Generally there are instructions on the package if you want to bake and I follow those, but reduce the time by a minute or two. You NEVER cook bacon to a full 165 degrees because it continues to cook through its internal heat and will ruin the flavor and texture. 
  • Slice your tomato to resemble a hamburger patty; thick and juicy. Dust each slice with salt and pepper. Tomato loves salt and soaks it up, so be liberal.
  • Rinse and tear your lettuce in large, ragged chunks.
  • Lightly toast the buns, face down to get a little texture to absorb the mayo.
  • Add mayo liberally to top and bottom bun. If it oozes out a little with each bite, that’s about right.
  • Layer bottom bun with lettuce, bacon, tomato, then top bun.

What stuff should I not add to my BLT?

  • cheese
  • avocado
  • mustard, ketchup, or hot sauce (ewww…)
  • fried egg or egg salad
  • tuna or chicken salad
  • deli meat

Look, I appreciate the desire to garnish. I have made my BLT with many of these things and realized I now have an egg  salad sandwich with bacon. Or a turkey club. If you start adding the stuff listed above, it’s not a BLT. You’ll be missing the point.

Serve with pickles and the usual picnic lunch sides. While chewing, raise hand in whatever hail Mary, peace and love, praise Jesus, party on, or namaste salute you feel is appropriate as your BLT craving is thus satisfied.

Nom On,

~Crunchy

Cream cheese sopapilla: Cinnamon-sugar perfection

So I got all ambitious and bought LOADS of cream cheese a couple weeks ago thinking I’d attempt a cheesecake. And it sits there. And it sits there. And it sits there. I’m getting desperate. I need to use this stuff but I just don’t have time to make a cheesecake. Gak! After endless searching I stumble on this adorable little confection. It’s got sugar and spice and its handheld (a theme with me) and …. cream cheese! Yes. The process was still a bit time consuming, but man are these little suckers GOOD. I have had a hard time staying away from them they are so freaking good, and I don’t have a sweet tooth. No doubt they will tickle yours!

Cream Cheese Sopapillas

Ingredients

Filling

  • 1/2 pkg (4 oz) light cream cheese
  • 1/4 cup sugar
  • 1/2 tsp vanilla

Crust

  • 1 pkg refrigerated pie crusts
  • 2 tbsp butter, melted
  • 1/4 cup sugar
  • 1 tsp cinnamon
  • 2 inch round biscuit cutter, or small juice glass

Preparation

  • Set the cream cheese out to begin softening.
  • Sprinkle flour on your board or cutting surface. Roll out crusts and cut out as many 2 inch rounds as you can. I had to combine and re-roll a few times. You should get about 24 rounds. Pop them in the fridge to keep cool.
  • Once the rounds are done and the cheese has softened, combine the filling ingredients and blend with a hand blender until smooth and soft. Use a rubber spatula to transfer to a sandwich baggie. Set aside.
  • Pre-heat oven to 350.
  • Line two cookie sheets with parchment paper and lay out 12 crust rounds.
  • Snip the end off your filling baggie and pipe a small amount of filling onto each round.
  • Top the filling with the remaining 12 crust rounds. Using a fork, press along the edges of each pie to seal the crust layers together.
  • Bake at 350 degrees for 12-14 minutes.
  • In the meantime,
    • combine sugar and cinnamon in a shallow bowl. Set aside.
    • melt your butter in a bowl. Set aside.

When ready, let the pies cool just slightly.

  • Coat the tops of your pies.
  • Either dunk and cover your pies in the sugar mixture, or sprinkle over the tops. It just depends on how sweet you want them to be.

Depending on when you serve them, they go great with fresh berries and a vanilla latte. Or you can just guilty pluck one out of the fridge every time you go in the kitchen. I hear tell the calories don’t count if no one sees you eat it.

Nom On, 

~Crunchy

Shout out: Although my version tastes more like a mildly sweet tart, I did want to give credit to the clever baker who created this variation of the traditional sopapilla: http://www.crazyforcrust.com/2013/04/sopapilla-cheesecake-hand-pies/

Quesadilla Flight: The cure to the Saturday lunch doldrums

Oh lord, It’s Saturday afternoon again. The whole family is milling around, wanting lunch and a stack of sandwiches just sounds so….weekday sad. The errands are done and maybe you have a little more time to cook than usual. You look in the fridge and see a bunch of random, almost used up stuff like chicken breast, deli meat, and a couple hunks of cheese. I keep a stack of corn tortillas handy to handle Saturday afternoon, because nothing uses up leftovers and delights the palate like the quesadilla flight!

Quesadilla Flight

The Quesadilla Flight

Ingredients

  • Shredded Cheese – any kind, seriously. You can use cream cheese, too. I find jack or mozzerlla to be the most-kid friendly, so if you have that, use it.
  • Filling – empty your fridge of things like the tomato and avocado that are close to spoiling, the almost empty tub of deli meat, that lone left over chicken breast, the ubiqutous 1/2 onion … you get the idea. These all sound obvious but you can use up squash and that 1/4 jar of spaghetti sauce, too. Corn tortillas are one of the most versatile canvases ever, so don’t assume your flight has to only offer the more classic Mexican cuisine flavors.
  • Corn tortillas – they are healthier, tastier, and less caloric than flour. They are also smaller in size and maximize your number of canvases to make your combos. You’ll see.
  • Extra virgin olive oil

Preparation

  • Thinly slice veggies or finely dice whole pieces of meat such as chicken breast or pork tenderloin. Thinly sliced or finely diced ingredients cook better in quesadillas.
  • Shred your various cheeses and, depending on how compatible the flavors of the cheese, either keep them seperate or blend them. For examle, jack, cheddar, and mozzerella can be blended. Gouda usually can’t pair unless you have another nutty or smokey cheese like gruyere left over also. If you really want to up the diversity of your flights, don’t combine cheeses.
  • Let the crazy begin! I just go with flavors and pairings that I know to go well together based on what I have to work with. Cheddar, ham, and tomato slices. Pepper jack, turkey, and avocado slices. Cream cheese with tomato and olives. Jack with shredded chicken, diced onion, and cilantro. If I have nutty or smokey cheeses to use up, I add thin apple slices and some sauteed onions. Some cheeses pair well with pesto or berry jams, and of course if you have left overs from spaghetti night, just do a thin smear of tomato sauce, mozzarella, ham, and olives.
  • To cook the quesadillas, just put your pan over a medium-low flame and add a litte EVOO. Place the tortilla into the pan and rub around to coat. If using sauce, spreads or jams, spread that first. Then, sprinkle the cheese and then layer meat and then veggies. I let the cheese melt a little and then fold the tortilla over. You just want to cook each side to lightly brown and get the cheese gooey.
  • Repeat with various combos, based on your ingredients. I generally end up with quite a variety, even in I just omit an ingredient here or there or sub another. The goal is to make a flight, so they shouldn’t all taste just the same.
  • Serve with dips, lime or lemon wedges, or extra tomato slices dusted with salt and pepper. A little side salad if you have it handy.

Note: These guys get cold fast, so I am basically a short order cook. Serve as batches are ready and encourage your peeps to dig in. As Chef, you should be nomming as you cook. For this reason, I don’t make the same quesadilla twice in a row or your batches won’t be ‘flights.’

Dips to serve with my flights?

I am a dips, salsas, and sauces fanatic. As far as I am concerned, the food I eat is just a vehicle for the real flavor payload. So why not offer some with your quesadilla flight? Quick prep or left over salsa is obvious, but here are a few others I whip up.

Guac and Spiced Sour Cream

Crunchy’s Guacamole Dip

Ingredients

  • 2-3 Ripe avocados, cubed
  • 1 or 2 Roma tomatoes, chopped
  • 1/2 Red onion, coarsely chopped
  • 2 to 3 Garlic cloves, roughly diced
  • Fresh squeezed juice from 1 to 1 1/2 Limes
  • Salt and pepper, to taste
  • Ground cayenne, to taste
  • Cilantro, ripped or roughly chopped

Preparation

  • With a fork, mash and stir the avocado. You can leave it a little chunky; it’ll get smooth as you mix in your spices.
  • Fold in the tomato, onion, diced garlic and stir.
  • Squeeze in the lime juice and stir.
  • Add in about 1/4 tsp of salt and 1/8 tsp black pepper. Stir and taste.
  • Add in a few shakes of cayenne. Stir and taste.
  • If your quac seems bland, you can add in a little more salt or cayenne, but don’t go to crazy. Ground spices are more potent than freshly chopped peppers so the taste changes quickly.
  • Cover with plastic or seal with a lid if you prepped in tupperware. Refrigerate for 30 minutes or so. Perfect to prep this right before you start the quesadillas. Ground spices need way less time to soak and marinate than fresh ingredients.
  • When you serve, sprinkle a little cilantro on top. It’s more colorful and less overpowering this way than when you mix in with the other spices to marinate.

Crunchy’s Spiced Sour Cream Dip

  • When you are ready to serve the first batch of quesadillas, add a healthy dollop of sour cream to each plate. Dust each with black and/or cayenne pepper.
  • Dash some olive oil into your hot pan and pop a handful of diced onions in there. Stir and lightly sauté.
  • Add a tablespoon of the onions to each dollop of sour cream and serve.

I don’t know about you, but at this point, I am ready to … nom on,

~Crunchy

Mango-Habanero Salsa

Ah, the mango-habanero marriage. Bright, fresh heat that bursts through your mouth and nose like the sun warms your skin when you turn your face up to it. Yeah; yeah I am being poetic because what’s happening when you mix orange habenero peppers with ripe mango is f**king amazing. Throw in some pineapple, cilantro, lime juice, and red onion….dear god.

So, how do you get that action? I love a good salsa, so let’s start there.

Mango-Habanero Salsa

Mango-Habanero Salsa

Special Equipment

  • Blender or Food Processor

Ingredients

  • 1 medium tomato, chopped
  • 2 habanero peppers, chopped
  • 2 tablespoons cilantro, chopped
  • 1 small, ripe mango, chopped
  • 1/2 cup chopped, red onion
  • Juice from 1 lime
  • Salt to taste

Preparation

  • Set out your blender or food processor and add all of the ingredients to it.
  • Depending on how you like your salsa (chunky or smooth) process it until you are happy with the texture.
  • Transfer to a bowl or Tupperware and refrigerate for at least 2 hours.

Ok, I have salsa, so now what?

Well, my friend, I will list the pairings in order of raddness with this salsa.

  • Shrimp
  • White, mild fish
  • Shredded chicken
  • Shredded pork
  • Diced chicken
  • Diced pork

You can also just scoop it up with chips and make the magic happen that way.

But what would be the ideal recipe for this?

Pineapple and Shrimp Street Tacos

Ingredients

  • 1 pound fresh shrimp – de-shelled and tails removed
  • 1 8oz can diced pineapple chunks, drained
  • 1 medium vadalia or other sweet onion, chopped into large chunks
  • Chopped cilantro
  • Extra virgin olive oil or Grapeseed oil
  • Corn Tortillas
  • Salt and pepper

Preparation

  • You can either use a standard outdoor grill, an electric grill, or a cast iron stove top grill, depending on what you have available.
  • Brush oil all over your ingredients, except cilantro. Season with a dusting of salt, and then pepper.
  • With a paper towel, rub a little oil on your grill space if you are using an electric or cast iron stove top grill.
  • Once your grill is hot, spread your ingredients, except cilantro, on the grill and cook for approximately 3 minutes per side. The goal is to lightly char the veggies and cook the shrimp until it is translucent.
  • While your fillings are cooking, heat up your tortillas over an open burner on your stove. Store them in a tortilla warmer until you are finished heating them all up.

Pineapple and Shrimp Skewers

  • The prep is almost identical, but for ingredients, buy pineapple rings and chop them in larger chunks, in some cherry tomatoes, and cut the sweet onion into large chunks.
  • Thread on a wood skewer soaked in water or a metal skewer and brush with olive oil. You can sprinkle salt and pepper, too, if you like.
  • Heat on your grill for about 3 minutes per side to char the veggies and get the shrimp translucent.

If you want a really light dish, just serve each person two tacos (or skewers) with the salsa spread over them and sprinkled with cilantro. If you need some starch to keep you full, I recommend a plain rice, like basmati, with a little butter and salt. You have so much flavor, just don’t make a starchy side with loads of spice to compete with your main course.

Nom On,

~Crunchy

Roast Pork Tenderloin

I really like pork tenderloin. It’s easy to cook without baby sitting, is completely delicious, lean, utterly versatile, and the left overs make for some tasty-ass lunches and weeknight meals. I will share the basic recipe to cook the tenderloin and a few yummy things I have made with it in the past.

Roast Pork Tenderloin

I had a really hard time finding a basic roast method online for pork tenderloin, so I wanted to share mine. There are SO MANY ways to make tenderloin that range from pan searing and transferring to the oven, slow cooker, fussy spice rubs, glazes, overnight marinades, and full one-pan meals where the roast and veggies had to be basted regularly. It was really starting to piss me off. I knew the method existed, why couldn’t I find it again?? After about an hour and many, many search strings, I finally got something that gave me a base approach I could build out, fuss-free. You’re welcome.

Ingredients

  • 1 1/2 pound package of pork tenderloin
  • 1 large, yellow onion
  • Whole white mushrooms
  • A few cloves of garlic
  • Extra Virgin Olive Oil or Grapeseed Oil (*Don’t be cheap! Alert)
  • Salt and pepper

Preparation

  • Pre-heat the oven to 400 Degrees.
  • Trim any silver skin and excess fat from roast, wash it off thoroughly, and pat dry with a paper towel.
  • Rub the roast all over with the oil and place in a roasting pan.
  • Sprinkle the roast with salt and then freshly ground black pepper.
    Make sure you roll the roast around so it gets coated everywhere with the seasoning. This makes a big difference in the quality of your drippings should you want to make gravy. You can definitely add other spices to your rub if you want – dried parsley, rosemary, sage, and thyme are popular additions.
  • Cut your yellow onion up in quarters or large, rough slices. If you slice, be sure to halve the slices. I like slices personally, they caramelize nicely and taste great with each bite of roast. Yummy in sandwiches, too.
  • Next, toss your mushrooms, garlic cloves, and onion in olive oil. Spread them in the pan around the roast and then season liberally with salt and fresh, black pepper.
  • Pop that bad boy in the oven for about 40 minutes. If you drank too much wine during prep, now is a great time to pass out on the carpet in front of the TV machine for a sober-up snooze.
  • After the timer goes off and wakes you up, grab your digital thermometer and check the temp in the thickest part of the roast. If it’s between 158 and 160 degrees, pull the roast out and let it rest for at least 10 minutes.

If you want gravy….

  • Grab a baster and suck out the drippings. Add a 1/4 cup of the drippings into a small sauce pot and turn the flame on low. Stir 1/4 cup of flour into a measuring cup filled with 2 cups of COLD water and mix well.
  • Now comes the tricky part. While stirring the drippings constantly, slowly add the flour/water mixture to the drippings. Keep stirring! Keep stirring and stirring until you start to see the gravy get thick and smooth. If it’s thin, don’t stress. The cold air will thicken it when you are done cooking.
  • Taste it. If it’s bland, add in more drippings a 1/4 cup at a time until you reach gravy nirvana. You can add in salt and pepper to season. You can add in a splash of white wine or sherry if its handy, or a dash of cayenne if you want a little zippy-do-dah thing happenin’. This part is up to you. It’s your nirvana.

Finally, we eat! 

Slice the roast and serve it with a scoop of the caramelized veggies and gravy, if you made it. If you didn’t, a flight of sweet-hot mustard, a tart berry jam, and mint jelly is always fun. Hell, eat it plain. Your side is totally wide open. Couscous or quinoa, mashed potatoes, steamed veggies, egg noodles, stuffing. Enjoy!

When to get freaky…

As I said earlier, this roast can be a really elaborate dish cooked with creative glazes that range from sweet to spicy to tart, it can be simple comfort food served with gravy, mashed pataters, and green beans, elegant stuffed with figs and stilton cheese and served over a bed of couscous with a flight of jams and mustards  for garnish, and it can be prepped in advance so you have plenty of food for the week. When to get crazy is totally your call and there are a million recipes out there to try.

 So much leftover….

Oh, this is the best part!! Run to the farmers market, if you have access to one, or hit the bakery section of the grocery store and get yourself a nice, crusty roll of baguette or country bread. Buy some crazy mustard or jam you have always been curious to try (Jalapeño jelly… really? When would I use that…?) You can get cream cheese, too. Just go for flavor, flavor, flavor! Farmer’s markets often have fun spreads and gourmet oils and vinaigrettes you can pick up. I made a sandwich with garlic-mint cheese spread and sweet jalapeño jelly with a few of the caramelized onions. Oh. My. God.

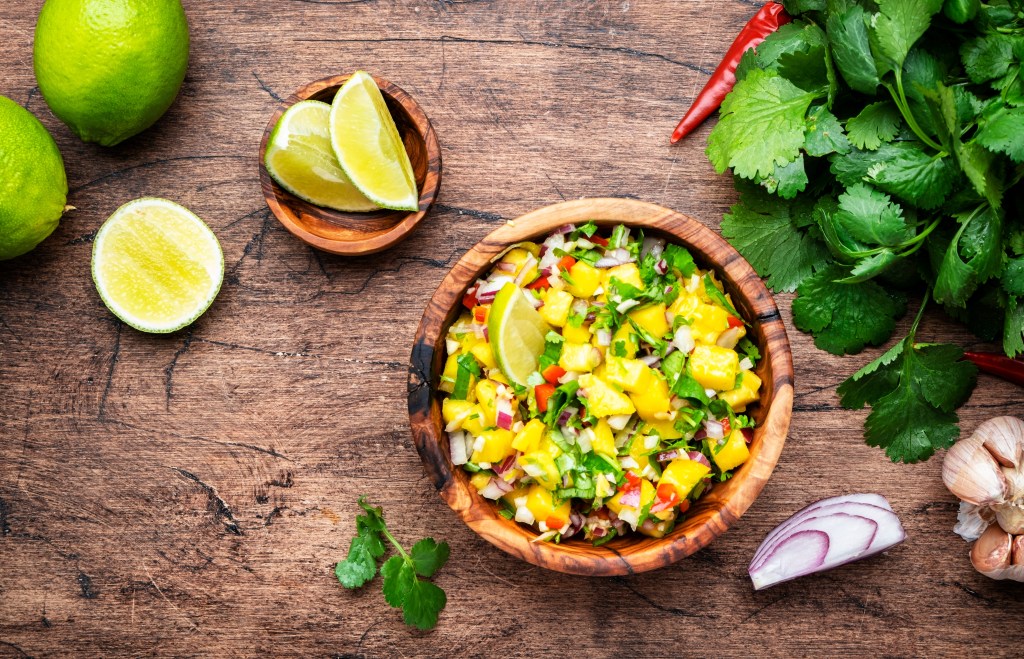
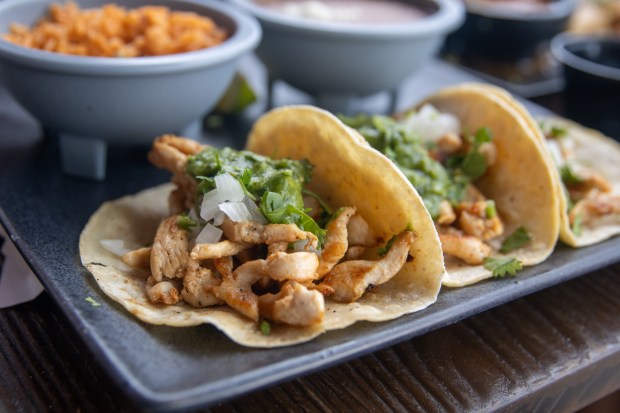
You can also lightly sear it in a pan with a little oil and pop it in a stew or soup. The broth will tenderize the chunks of meat as the soup cooks. Or, shred it, stuff into a grilled corn tortilla, and add mango-habanero salsa and a sprinkle of onion and cilantro for crunch. So many parties in your mouth, so little time.

Nom on,

~Crunchy