Egg Nog: A very, merry yuletide

We’ve all been there. The kid is looking at us with wide, glowing eyes and asking us if Santa exists and will he grant them their precious wishes. I’m still trying to encourage my cynical child to believe he does exist, so I have to bring my A-game. Well, if I had to stuff myself down a chimney (which I don’t have) and leave over priced toys for a kid I don’t even know … would I want to be sober for it? Certainly not.

Enter The Nog. I’m not talking about the nasty stuff they sell in cartons at the grocery store that should not even be allowed to be labeled Egg Nog. There really out to be a law, that stuff is such a travesty. I am talking about the real deal. I prefer to make the Puerto Rican varietal that uses Spiced Rum called Coquito.
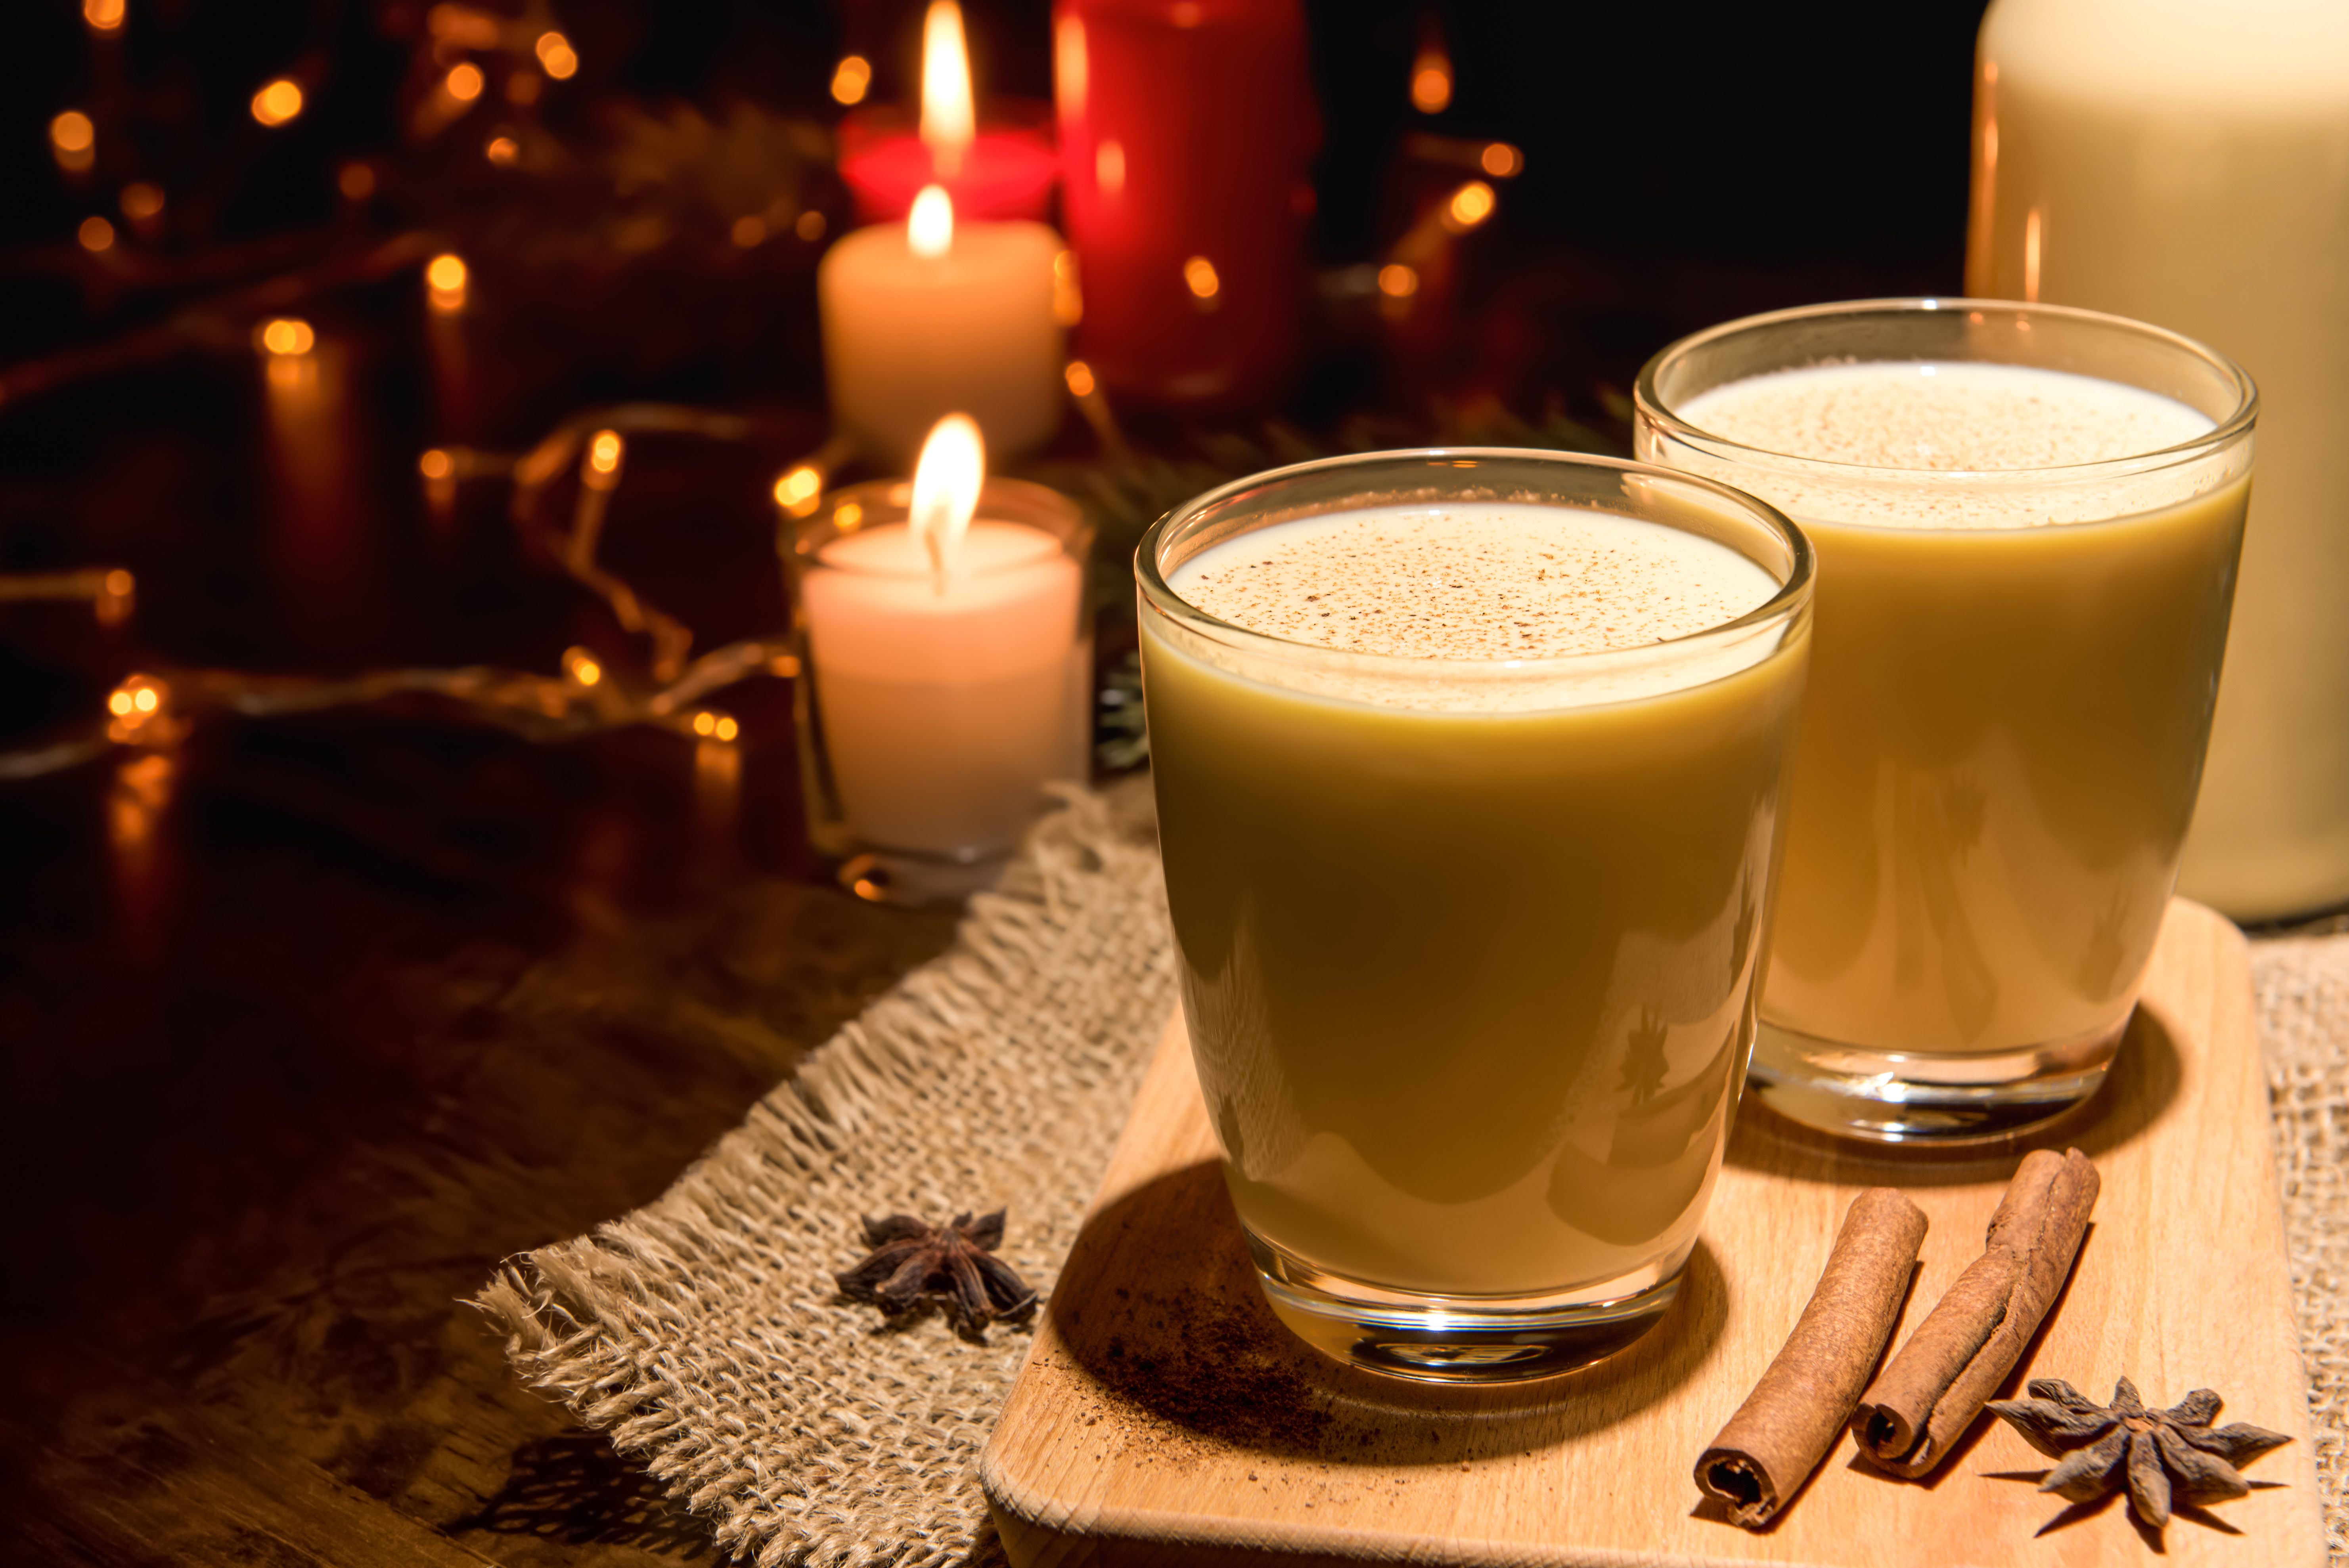
Egg Nog

A word of warning about The Nog. This is NOT a cheap dish to make. I never spend less than 100 bucks, but it is so. worth. it. Instead of polluting the ingredient list with a bunch of *Don’t be cheap alerts, I am just going to apply it to the whole list. Go organic on the dairy products, get free range eggs, get the top shelf booze, and get the highest quality French vanilla ice cream. They all affect the flavor. Egg Nog is a magical experience and you’ll only have it once a year.

Ingredients

  • 24 Eggs
  • 2 Cups Sugar
  • 1 Quart Heavy Cream
  • 2 Quarts Whole Milk
  • 1 Liter of Brandy (British), Bourbon (American), or Spiced Rum (Puerto Rican.)
  • 1 Quart French Vanilla Ice Cream, softened.
  • Pinch of Salt
  • Ground Nutmeg (for garnish.)

Preparation

  • In one 5 quart mixing bowl and 1 1.5 quart mixing bowl seperate the eggs. I have tried many methods and the fastest way to do it is to crack each egg and use the shells to dash back and forth until the whites separate from the yolk. The yolk goes into the 5 quart bowl and the whites go into the 1.5 quart bowl.
    If you want to see how this method works, you can check out this video: https://youtu.be/t-OwbEy-Vxk
  • Once you have finished separating the yolks and the whites, add the sugar to the yolks. You will need to beat the yolks briskly with a wire whisk for 3 minutes. They should be thick and lemon-colored.
  • Next, you will fold in the dairy. Add the milk and cream. Keep whisking.
  • Next pour in the liquor you chose.
  • And after that it’s time to fold in the french vanilla ice cream.
  • By now your arms should be pretty tired and you’ll be wondering why you read my blog or why you bothered engaging in this particular project. But don’t worry, you’re almost done.
  • It’s time to add a pinch of salt to the egg whites, bust out the hand mixer and whip them until they form soft peaks. This should take about 5 minutes. I have tried to do this by hand so many times. Don’t bother. I have only gotten the soft peaks with a hand mixer. I find it best just to accept one’s inadequacies and let the robot take over the world. If you don’t know what soft peaks are, here’s a video: https://www.youtube.com/watch/wMTxkDzBqSU
  • Now that you have your soft peaks, it is time to fold them in to the 5 quart bowl with the rest of the mixture. Folding is yet another technique that may be new to you. So check out this video: https://www.youtube.com/watch?v=skWSIFfIMqc
  • After you have finished all that, cover the mixture and refrigerate for at least 20 minutes before serving.
  • The customary garnish is ground nutmeg. Just give each cup a sprinkle, and, well, Bob’s your uncle.

Nom-Your-Jolly-Old-Saint-Nick-Self-On,

~Crunchy

Chicken Pot Pie Muffins

Chicken pot pie is one of my very favorite comfort foods, but it comes with a host of problems. They are hard to make, because, pie, they are really dense so I can (read: should) never finish one, and unless I have a frozen one on hand I am never going to satisfy said craving when I’m actually feeling it. Imagine my delight at discovering this little hack! It’s simple, uses up left over rotisserie chicken if you have it, and all comes together with typical pantry staples so it’s economical as well.

Ingredients:

  • 1 cup diced Rotisserie Chicken or 1 10 oz can shredded chicken in water, drained
  • 1 can Cream of Chicken soup
  • 1 10 oz package of frozen Peas and Carrots
  • 1 can of Pillsbury Grand Biscuits
  • Salt and Pepper to taste

Preparation:

  • Pre-heat oven to 375 degrees Fahrenheit.
  • Prep muffin tin with either a coat of oil or non-stick spray.
  • Combine chicken, half of the bag of frozen peas and carrots, salt and pepper, and Cream of Chicken soup.
  • Press one biscuit into each muffin cup and spread it out so that it covers the surface.
  • Once the crust is prepared, spoon the mixture into each crust base and fill to about 3/4 quarters of the way.

Optional:

  • You can add cheddar or parmesan cheese.

Pop the tin into the oven and bake for 25-30 minutes. I recommend coating the crust with a little butter to give it a nice brown.

Cool for about 5 minutes, sprinkle with parsley, and Nom On!

~Crunchy

Juicy Baked Pork Chops: Perfectly spiced and everything nice

You know how it is. You see that package of pork chops on sale and you’re like, ‘Oh, Dang! That’s a good deal! I can feed the 5th battalion with that! Word.’ And so you buy it and stick in the fridge and some days go by. You open the refrigerator door several times a day and those pork chops stare at you. And then, they start editorializing. ‘You know we are going to go bad soon, right?’ ‘SLAM!’ The next day … ‘You know you didn’t save any money if you just end up throwing us away, right?’ ‘Huff! SLAM!’

And then it gets really sad, because you start having a conversation with the hecklers. ‘We’re still here.’ You can’t take the pressure any more so you yell back, you know, at the pork. “The 5th battalion isn’t coming. I don’t even have a phone number! It’s just that thing you tell yourself when meat goes on sale!’

Well, fellow travelers. Here’s how to snatch those chops from the pearly gates and make something glorious.

Spiced Pork Chops

Equipment

  • 9X13 Inch Glass Baking Dish

Ingredients

  • 6 boneless pork chops
  • Extra Virgin Olive Oil (EVOO)
  • Salt
  • Pepper
  • Cayenne Pepper
  • Crushed Red Pepper
  • Ground Cinnamon

Preparation

  • Preheat the oven to 400 degrees.
  • Coat a 9X13 inch glass baking dish with EVOO.
  • Place pork chops in the baking dish.
    • *Note: The pork needs to fit snuggly together to tenderize and conserve juices. If there is too much space between the chops, use a smaller baking dish.

Now, for the fun:

  • For my recipe I used EVOO liberally, salt, pepper, cayenne, crushed red pepper, and cinnamon. I measured nothing. It was all on a wing and a prayer and, lord have mercy did it turn out amazing.
  • Now that you have had fun bedazzling both sides of your pork chop and you have made sure they are all snugly tucked together, your oven should be ready!
  • Pop them in on the middle rack for 16-18 minutes, uncovered. You want to reach an internal temperature of 145. Let the pork rest for about 5 minutes.

That’s it. Seriously. 10 minutes of prep, 20 minutes of cooking while you pound pinot grigio and spoil your appetite, and dinner is ready.

Is this a main dish or a base recipe?

Both.

This pork turned out juicy, complex, and delicate all at the same time. So if you want, just pair it with a starch and a green and ring the chow bell.

Or, because my rub is spicy, with a hint of ‘what the hell?’ due to the cinnamon, you can lean in for a little Caribbean-inspired fusion. I made a pork-mango salad for the spousal unit, but you whip up a batch of habanero-mango salsa and …. swaying to calypsos, baby.

So there you have it, fellow travellers, on-sale pork redemption.

Nom on,

~Crunchy

Cinnamon Buns (of Oblivion)

Cinnamon buns really piss me off. You see, I am extremely intolerant of sugar. I can never remember if its hypo or hyperglycemia. I just know that two Cosmopolitans had enough sugar in them to knock me out cold sitting in rock hard seats in the nose bleed section outside at a White Zombie/Ozzie Osborne concert on a blustery November night. Oh yeah, that happened.

So you can imagine how much I have to avoid sugar. An interesting problem, since I love to bake. I can enjoy the wonderful smells at least, and the smiles my cookies and cakes give to others. Not so with the smell of freshly baked cinnamon buns. I always break down and eat a half of one. Then I sink into black oblivion, the gooey evidence of my trespass clutched in my sticky hand. If you want to join me there, friends, just follow the cinnamon and cream cheese frosted road…

Cinnamon Buns with Cream Cheese Frosting

Ingredients

  • 2 oz Cream Cheese
  • 3 oz Butter
  • 1 1/2 cups self-rising flour
  • 8 oz Greek Yogurt
  • 1/2 cup powdered sugar
  • 1 1/2 tsp Ground Cinnamon
  • 1/3 cup Light Brown Sugar
  • 1/4 tsp Salt

Preparation

  • Place butter in a small bowl and microwave for 30-60 seconds, or place in a small pot and melt over low flame. Once its mostly melted, set aside. It will be fully melted by the time you need it.
  • Add self-rising flour to a medium mixing bowl along with 2 Tbsp of melted butter. Add in the yogurt, 1/4 cup of powdered sugar, and 1 Tbsp of water.
  • Mix with clean hands until you have a shaggy dough.
  • On a flat work surface, like a large wooden cutting board or marble counter top, sprinkle liberally with bench flour. Coat your hands liberally, too. Add some more flour to a bowl and keep it handy. You’ll need it.
  • Turn out the dough onto your work surface and knead into a smooth and slightly sticky ball. You may need to sprinkle the dough with flour or coat your hands a few times during this process. Let the dough rest (being kneaded is hard work, after all) for 5 minutes while you make the cinnamon mixture.
  • In a small bowl, combine the brown sugar, remaining butter, cinnamon, and salt.
  • Using a rolling pin coated in flour, roll out your dough into an 8 X 11 oval. Cover almost the entire surface with the mixture. I leave a very thin edge all the way around.
  • Starting on the short side, roll your dough into a cylinder. Cut into 6 equal slices.
CinnamonRollsPrep.JPG

  • In a round baking pan or cast iron skillet, coat with a little oil or non-stick spray, and then assemble your slices into a tight ring with one slice in the center and the rest surrounding. They need to be snuggly pressed together to ensure the rolls don’t fall open during baking and the dough puffs upwards.
  • Bake the rolls at 375 degrees for 30-35 minutes. The tops should be lightly brown when done.
  • While the buns are baking, stir together the cream cheese, remaining powdered sugar, and 1 Tbsp of water. Stir the mixture until smooth.
  • Once the buns are done, I like to spread the frosting while they are still pretty warm so you get the drippy and gooey effect. If you like your frosting firm, let the buns cool first before you spread.

Oblivion awaits,
~Crunchy

Tomato Bisque

Tomato Bisque and I go way back. My mother served it often with it’s very best friend, grilled cheese sandwiches. It was the only decent meal we were served when I taught up in the mountains at Outdoor Science School. I’d always just eaten the canned stuff, until one day I decided to give it a shot and make it from scratch. I remember my girl was about 18 months old and hated everything I made her. But when I let her try a spoonful of this delicious, silky soup her face broke into a huge grin and she said “MMMmmmmmmMMM!” Be still my beating heart.

Tomato Bisque

Special Equipment

  • 5-6 Quart Dutch Oven
  • Immersion Blender or Blender

Ingredients (Yields 8 cups)

  • 2 tbsp extra virgin olive oil (EVOO)
  • 1 tbsp unsalted butter
  • 1 large white onion, finely chopped
  • 1 large garlic clove, smashed and peeled
  • 1 tbsp flour
  • 3 cups water and 1 and 1/2 large chicken bouillon cube OR 3 cups chicken broth
  • 28 oz can of whole plum tomatoes and juice
  • 1 1/2 tsp sugar
  • 1 sprig of fresh thyme
  • 1/4 tsp salt
  • 1/4 tsp pepper

Preparation

  • in a 5 or 6 quart dutch oven, heat the oil and butter over medium heat until the butter melts.
  • Add the onion and garlic and cook until soft. Stir occasionally and ensure it doesn’t get brown. Reduce the flame to low when its done.
  • Add the flour and stir to coat the onion and garlic.
  • Add the remaining ingredients and return the flame to medium-high. Stir the mixture to ensure the flour isn’t sticking to the pan.
  • Once you bring the mixture to a boil, reduce the flame and simmer, covered, for 40 minutes. I like to check on it every 10 minutes and stir it a little.
  • Once the time’s up, let the soup cool down a little. Pull out the sprig and discard. Using an immersion blender, puree the soup until its silky and creamy. You will have small bits of onion no matter how much your puree it, but I think it makes for a nice texture.

Note: If you don’t own an immersion blender I strongly recommend you invest in one. It makes so many pain-in-the-ass tasks easier. But in the meantime, you can transfer the mixture into your blender and puree in batches. Return the soup to the pot for serving. 

You can garnish with a little freshly ground pepper, a dollop of sour cream, sprinkle of dill, finely diced chives, or a grating of parmesan cheese.

Nom On,

~Crunchy

Mole, Demystified

Until a year ago mole was this dish I’d heard mentioned a few times, always with a certain amount of reverence from my Mexican friends and family. Considering my Latin Cuisine savvy didn’t get much further than some form of meat, beans, and salsa intersecting with tortillas, fried into some clever shape to get goods in my mouth, I wasn’t sure what the big deal was. When my daughter turned one my husband informs me with awe that the little princesa will have mole made from scratch for her party. I am a spicy food addict so when I tried it, I remember mostly being confused. I wasn’t sure what I was tasting exactly, it wasn’t sweet, it wasn’t savory, it wasn’t spicy. It was just … mole. Weird.

I forgot all about it until a few weeks ago when my salsa lady at the farmers market asks if I want to sample her mole. There’s that word again. Sure, I say, and imagine my surprise when she hands me a jar of … what I can only describe as goop. She proceeds to explain how to use it to make a sauce and off I go, more than a little freaked out. And now, after much research and experimentation I bring to you the simple, cheater-cheater-pumpkin-eater way to make both dark and green mole.

 Mole Negro Sauce

Ingredients 

  • 2 – 3 heaping tbsp of dark mole paste, depending on how thick you want the sauce
  • 2  cups chicken broth
  • 1 tsp cayenne pepper
  • Salt and pepper to taste
  • 2 disks Mexican chocolate
  • 1/2 cup almond butter

Preparation

  • Add 2 cups of broth to the blender. Add the dark mole paste, almond butter, cayenne pepper, 1/4 tsp salt, and 1/8 tsp pepper to the blender as well. Break up the chocolate and add into the blender. Blend ingredients until you have a smooth sauce.
  • In a medium-sized pot add the mole sauce. Simmer on low for about 20-30 minutes, stirring occasionally. 
  • While the sauce is thickening and simmering, slice a red onion into thin rings. Cut the rings in half once. Put them in a bowl and squeeze one whole lemon and stir to coat. They need to marinate for about 30 minutes. 

Mole Verde Sauce

Ingredients 

  • 4 cups of chicken stock
  • 2 – 3 heaping tbsp of green mole paste, depending on how thick you want the sauce
  • 1 pd tomatillos, husks removed
  • Peppers:
    • Mild: 1 chopped passila
    • Medium: 2 chopped jalapenos
    • Hot: 2 chopped serranos
  • salt and pepper to taste

Preparation

  • In a large stock pot, add your husked tomatillos, cover with broth, and boil for 20 minutes, until soft. 
  • Add to the blender:
    • Tomatillos
    • 2 cups of the broth from the stock pot
    • 2-3 heaping tablespoons of green mole paste
    • Chopped peppers
  • Blend ingredients until you have a smooth sauce.
  • In a medium-sized pot, add the mole sauce. Simmer on low for about 20-30 minutes, stirring occasionally. 
  • While the sauce is thickening and simmering, slice a red onion into thin rings. Cut the rings in half once. Put them in a bowl and squeeze one whole lemon and stir to coat. They need to marinate for about 30 minutes. 

Notes: 

  • Traditionally, mole is served drenching a chicken quarter. Add Spanish rice and warn corn tortillas on the side with picked red onion and cilantro to garnish. You can also mix your shredded chicken into the sauce during the simmering period and use it in your favorite Mexican entree: Tacos, burritos, quesadillas…
  • Can I plus this? You know you can! Poach your own chicken breasts to create the stock for your sauce and use that instead of store bought broth.
  • Note a fan of chicken? That’s ok! Add cubed steak into the sauce during the simmering period instead, and sub the chicken broth for beef broth.  
  • If you want to get a little creative, you can actually use the green or dark mole sauce to make enchiladas. Just make your casserole as usual but your mole sauce is substituted for ranchera sauce. For dark mole, I would use a smokier cheese like gouda and for the green mole I would use pepper jack.

So there you have it folks, mole demystified. The process of making the mole paste from scratch is insane and, from what I am told, is something that even the most accomplished Mexican home cooks don’t bother with more than a few times in their life. Now I know why it was a great honor that my mother-in-law made mole poblano from scratch for her reina pequena.

Nom On,

~Crunchy

BBQ Chicken Street Tacos

Ok, so I have posted a previous recipe for the mighty taco el carbon with instructions on how to pack it up for work and save yourself from the daily sandwich miasma. Now that you have mastered that, why not go fusion by making your tacos with shredded chicken smothered in sweet heat BBQ sauce? I’m pretty sure I just made your tummy rumble.

BBQ Chicken Street Tacos

BBQ Chicken Street Tacos

Ingredients

Preparation

  • In a small sauce pan, mix the shredded chicken and BBQ sauce together until the chicken is fully coated.
  • Heat the mixture over a very low flame, stirring often.
  • In the meantime, heat up a non stick or cast iron skillet and add the olive oil.
  • Heat up the tortillas until they are warm, soft, and have just a hint of crisp to the surface.

If you are taking this to work for lunch, transfer your tortillas to a plastic bag and seal. Transfer the warmed mixture to tupperware and put the chopped onion and cilantro into a small separate container as well. Whether you warm the mixture up again or not is your choice. If you want to reheat your tortillas just toss the bag in the microwave and heat for about 10 – 30 seconds. Don’t over do it or they will be rubbery.

When you are ready to eat, just assemble the tacos by layering two tortillas, spooning about 2 tbsp of the mixture and sprinkle onion and cilantro down the center.

Nom yo’ fusion tacos on!

~Crunchy

Poached Chicken

Ingredients

  • 1 6-8 oz frozen chicken breast
  • 1/2 cup white wine
  • 2-8 cups water
  • 1 large chicken boullion cube
  • Aromatics such as fresh basil, rosemary, thyme, garlic, sage, or dill can be added if desired.

Note: Aromatics is your chance to fold in some complex and delicate flavor that can either enhance the meat if you are eating with sides or you can pair the aromatics with flavors and spices you’ll be using in the dish the chicken is intended for. 

Prep

  • In a medium-sized pot, place the chicken breast inside and begin adding water, 2 cups at a time until the breast is covered. Add the 1/2 cup of wine. Add in aromatics if using.
  • Turn on the flame to a medium high and cover with a well fitted lid.
  • Bring to a boil. Remove the lid and crumble the bouillon cube into the boiling water. Replace the lid and continue boiling for one minute.
  • Turn off the flame and leave the lid on. Allow the chicken to poach for 20 minutes.

Note: You can use pre-made chicken broth or homemade stock if you have those on hand. Just swap them for the water and bouillon. 

Remove from the water and place on a cutting board. To check for doneness, I like to pull off a few large chunks with a fork. It should come apart easily if its tender. If you see any pink parts, you can return them to the water and let sit with the lid on for a few more minutes.

You now have moist, flavorful poached chicken that can be a base for TONS of recipes or served with veggies and a starch for a weeknight meal. You never need to buy an over priced can of shredded chicken or pick up a rotisserie chicken again. It’s low fat and hands off so you can be making other parts of your dish or even be poaching chicken to take to work in the morning while you get ready. And as a bonus, the toddler loves it.

~Nom On

Sweet Heat BBQ Sauce

Sauces are one of those things that seemed hard or mysterious to me. After all, if they weren’t hard, why is buying them pre-made such a prevalent practice, even among those who consider themselves good cooks? Why do we surrender the biggest flavor payload in our dish tos omething that makes a gloopy sound as it oozes out of plastic or glass jars? A few weeks ago when I hosted my late summer BBQ, I decided to make my own sauce and it was really pretty easy.

Sweet Heat BBQ Sauce

Ingredients

  • 1 tbsp extra virgin olive oil (EVOO)
  • 1/2 small onion, finely chopped
  • 1 garlic clove, finely chopped
  • 1 cup organic or reduced-sguar ketchup
  • 1/4 cup white or apple cider vinegar
  • 1/4 molasses
  • 3/4 cup water
  • 2 tbsp brown sugar
  • 2 tbsp dijon mustard
  • 2 tsp Worcestershire sauce
  • 1 tbsp chili powder
  • 1/4 cayenne pepper
  • 1/4 tsp salt
  • 1/2 tsp pepper

Preparation

  • Finely chop your onion and garlic.
  • In a medium saucepan, heat your EVOO. Add the onion and garlic and cook, stirring often, for about 3 minutes until soft.
  • Add the remaining ingredients and stir.
  • Bring the sauce to a gentle simmer and stir occasionally for about 10 minutes. Keep scrapping and folding the sauce off the sides of the pot and stirring. If the sauce seems a little thin you can simmer for another 2 minutes, but keep stirring and folding so it doesn’t get gooey.
  • Taste the sauce and add a little more salt and pepper, as needed.

The end result should be a crowd pleasing, sticky sauce with a nice balance between sweet, savory, and heat. I personally prefer ridiculously spicy sauces like Famous Dave’s Devil Spit or the Memphis/Kansas City varietals, which are hotter and more vinegary, but this sauce was lovely and hit the right notes for a crowd where you can’t go to far in one direction or another. You know a sauce is great when people lick their fingers instead of using a napkin and I saw a lot of that going on.

Enjoy the bragging rights for making your own sauce, and Nom On,

~Crunchy

The Case of the Disappearing Tequila-Habanero Spiced Pineapple Wontons

In case you are wondering why I have no picture for you, it’s because twice I made these, twice I served them to guests to give me feedback on my new recipe with the warning not to eat them all because I still needed a picture, and twice I turned around about 3 minutes later to see an empty plate where my wontons should be.

“Hey!,” I exclaim, “You were not supposed to eat them all before I took a picture!” The individual who swiped the last one chews more quietly, looking anywhere but at me. I sigh, “Never mind, I’ll make another batch later….” Except the spousal unit drank the last of the tequila and the rest of my pineapple went into a pineapple-blueberry wonton so it’s going to be awhile before I make these again. Given how delectable they are, I figured I had better share the recipe before your next party.

Missing

Tequila-Habanero Spiced Pineapple Wontons

Ingredients

  • 1 cup pineapple chunks
  • 1 habanero pepper, finely diced
  • 1 cup tequila (The best you can afford)
  • 4 oz cream cheese, softened
  • 1/2 small, red onion, diced
  • 2 tbsp cilantro, diced
  • 1/2 pkg wonton wrappers
  • 1 egg, beaten

Preparation

  • Finely dice the habanero pepper. Add your pineapple chunks to a small tupperware container and add the tequila and diced pepper. Cover and give the mixture a shake to make sure its distributed. Let the pineapple soak for a few hours. You can even leave these soaking for a few days if you want a stronger flavor.
  • Once your pineapple is ready, extract the chunks and finely dice them. Set aside.
  • Place your softened cream cheese in a medium bowl, and using a hand mixer, whip until soft and fluffy.
    If you are unfamiliar with whipping cream cheese, start the blades on slow and circle around a few times. The cheese will start to cling to the blades. Put the speed to high and beat against the side of the bowl in a circular motion and the cheese will come loose as it becomes soft and whipped.
  • Finely dice your onion and cilantro.
  • Add the diced pineapple, cilantro, and onion to the cream cheese. You should also add in the diced habanero from the marinade. Combine and stir with a rubber spatula until you have a well blended mixture.
  • Preheat the oven to 400 degrees and lay out your wonton wrappers. Start with 12 wrappers.
  • Beat your egg in a small bowl and set aside.
  • Place approx 1 tbsp of the mixture into the dead center of the wrapper.
    Use any manner of deep breathing techniques and chanting of ‘a little dab will do ya’ to resist the urge to add larger and larger globs of filling to the wontons. It will look like you didn’t put enough, but I promise it’s correct. The filling expands in the heat and will burst your wonton open.
  • Dip your finger in the egg and trace around the edge of each wonton. Fold the sides into an X and pinch together to seal.
  • Spray a little non-stick on a cookie sheet and transfer the wontons. Make sure they are evenly spaced apart.
  • Bake the wontons for 10-12 minutes until lightly golden and crisp.
  • Serve immediately.

What do you recommend as a dipping sauce? 

I can’t figure this part out. The flavors are so fusion. Do you want spicy? Do you want sweet? Do you want an asian sauce or a salsa? I offered 2 options and what I noticed is that my taste testers had very different preferences when they tried each sauce and then just started popping them in their mouth, sans sauce, at an increasingly rapid pace. Here’s what I made for your experimenting pleasure.

If you want to offer something with sweet notes, maybe you can rock a ponzu? If you try that, let me know how it goes!

Warning: Make sure you hold back one or two wontons before you serve these or you may find yourself lost in a godzilla-like rage similar to what we all feel when someone eats the last spring roll without asking if anyone else wanted it.

Nom On,

~Crunchy