Chile Rellenos: Fried batter goodness

I think it’s safe to say that we all have our favorite dishes from any cuisine. And no matter how complicated and labor intensive it is to make it on our own, we anoint the dish worth the effort to learn. On this particular weekend, I decided that dish would be the Chili Relleno. After god knows how many hours, and god knows how many glasses of wine (I refuse to believe the wine delayed the process one bit,) the end result was stinging eyes, possibly a chili seed that got in my nose from itching it, a sense of pride, and a fully-bellied nap afterwards meant for the gods. It’s called, winning!!

Chile Rellenos

Special Equipment

  • Cast Iron Skillet

Ingredients

  • 12 pasilla or Anaheim peppers
  • 1 pd block of jack or pepper jack cheese
    • *Note: If you have a smoked cheese, this is the time to use it. Some basic grocery stores sell habanero pepper jack and farmers markets often have cheese merchants that sell some amazing smoked cheeses.
  • Grapeseed Oil
  • 1 cup milk
  • 1 cup flour
  • 1 egg
  • 1 tsp baking powder
  • 1 tsp baking soda
  • 1 tsp salt

Preparation

  • Roast chili peppers

There are a few ways to do this. You can either brush the peppers with olive oil and roast them under the broiler, you can put them in a cast iron skillet or on a cast iron griddle, or you can put them right on the burner. The goal is to char the skins and get the peppers soft and flaccid. ( Heh, heh, she said ‘flaccid.’)

Roasted Peppers

When the chiles are done roasting, put them in a plastic bag to steam for a few minutes. If you don’t have time to finish the project you can actually leave the peppers in the bag until you are ready to make your rellenos.

Steamed Chiles

  • Slice a small opening into the chiles and scoop out the seeds. Using a paper towel and over the sink with the facet trickling, scrap the chard skins off the peppers.
  • Cut the 1 pound of cheese into 12 strips of equal size.
  • Stuff each pepper with a slice of cheese and close them up.
  • Mix the egg, flour, milk, baking soda and powder, salt and pepper and whisk with a fork. Sprinkle flour on your cutting board or prep surface.
  • Pour a fair amount of oil into your skillet, up to 1 inch and heat over a medium-high flame. (Personally, I don’t like cooking with that deep an oil bath because it splatters like crazy and is wasteful. I don’t cook with cheap oil, so I pour enough in to make about 1/4 inch bath and it browns the batter just fine.)
  • Now comes the tricky part. With your skillet oil slightly smoking, take a stuffed pepper and roll it in flour, than dip into the batter. Place the gooey, dripping mess into the oil and fry. Using tongs, each side only needs a minute or less, so roll as gently as you can to brown all sides of your relleno.
  • Once all the batter is fried, use tongs and transfer to a plate. Repeat that exact process with each of your peppers.
  • Once you have all your peppers fried, you may need to pop them in the microwave for just a few seconds to make sure that cheese is melted inside. This will depend on how thick the slices of cheese were that you stuffed the peppers with and how deep an oil bath you used.

How do I garnish and serve the rellenos?

Ok, this dish is popular all over central and south America and garnish styles do vary. If you are used to eating your rellenos served drenched in a mild ranchera sauce, you can certainly do that. I have had them that way, sometimes baked with a little cheese on top of the sauce. I have had rellenos served almost as a soup, the tomato sauce more a delicate broth than a sauce.  However, there are some communities that serve the dish plain and offer salsa roja or salsa verde and maybe a little sour cream to garnish as you see fit. I recommend you try it WITHOUT a sauce bath at least once because they are amaze-balls.

Try to eat your fill of rellenos BEFORE you look over at the disgusting, oil-splatter, batter-drip-covered nightmare your kitchen has become. It will bolster your spirits for the clean up job ahead. Or, if you have kids of chore-doing age, make those little punks deal with the mess while you take a nap and really give all that cheese and batter carte blanche access to your thighs.

Nom On,

~Crunchy

Salsa Roja de Chile de Arbol: Guadalajara’s secret sauce

It’s years back, my waistline was drastically smaller, and my husband, also skinnier, was still a boyfriend. We are at his mother’s house and I see 5 brown faces staring at my pasty, white one with a mix of anxiety and that smile we get when we are expecting to burst out laughing at any moment. A torta stuffed with beans and pork and completely drenched in this neon red sauce sit before me. Behold, the tortas ahogadas, a Guadalajarn treasure most anglos who call themselves Mexican Cuisine aficionados never even hear about. Only Alex’s mom, Maria, doesn’t look like she is going to laugh. She looks terrified because I told her not to hold back, but to drench the torta in the salsa roja as was the tradition. “I can handle it,” I promised.

Now was the moment to demonstrate my spice-eating chops. I cut off a big, heaping chunk of torta, the crowd draws a breath, and I chow down. I close my eyes as all sorts of awesome stuff starts happening in my mouth – heat and savory and, and … holy shit THAT’S HOT! I immediately grab my beer and suck down half of it in two gulps, getting an instant buzz. I look at the crowd with a big, dopey smile on my face and go back for more. ‘I can’t believe you can eat that!’ proclaims Alex’s younger brother, Jorge. ‘I just eat it with tomato sauce!’ I smile at him. “Well,” I say, “That settles it. I am more Mexican than you.”

It’s taken me years of experimentation and some coaching from Maria, but I am ready to share this amazing salsa with you. If you want to make it for dunking tortas, you will want a more watered down version of this, but otherwise it’s a great way to add heat and flavor to any dish that you want a salsa or hot sauce for. Buen provecho!

Salsa Roja de Chili de Arbol

Salsa Roja de Chili de Arbol

Ingredients

  • 30 dried chili de arbol peppers (located usually in the aisle with all the hanging bags of dried Mexican spices and specialty items)
  • 2 cups of water
  • 1 garlic clove, peeled and quartered
  • 1 8 oz can tomato sauce
  • 2 tsp vinegar
  • 1/2 tsp salt
  • 1/4 tsp pepper

Special Equipment

  • Blender or food processor
  • Fine mesh strainer
  • 1 corn tortilla

Preparation

  • In a medium pot, add water and dried chili peppers. Bring the water to a boil.
  • Boil the peppers for 5 minutes.
    • *Note: Rehydrating these extremely spicy peppers expels oils into the air that agitates eyes, nose, and throat. Turn on the vent fan and open the windows/doors. Babies and toddlers are especially annoyed by these fumes, so if you have the option to keep them in a different part of the home, that’s helpful. I have a tendency to prepare dishes that require broiling or dehydrating chili very early in the morning when everyone is asleep.
  • Turn off the flame and cover the pot with a well fitted lid. Let the chilis soak for about 20 minutes.
  • Add the chilis and about 1 cup of the chili-infused water to a blender. You can use a stick food processor in a large, plastic measuring cup too, if that’s handy.
  • Cut the garlic into quarters and toss in to the blender, along with the can of tomato sauce and vinegar.
  • Blend the ingredients together. Add 1/2 tsp of salt and pepper and blend a bit more.
  • Grab the corn tortilla, tear into shreds and taste. From here, you will want to keep adding salt at 1/8 tsp at a time, blending, and tasting until you are happy with the heat and flavor.
    • *Note: The bland corn tortilla will help you discover the right salt ratio to achieve the flavor you find appealing. If you use a salted chip for your taste test it will mislead you.
  • Place the fine mesh strainer over a measuring cup and add the sauce in batches. Using a spoon, press down on the seeds and pulp to push the liquid through. You can either save the seeds and pulp to make another dish with the spicy chili paste, or discard.

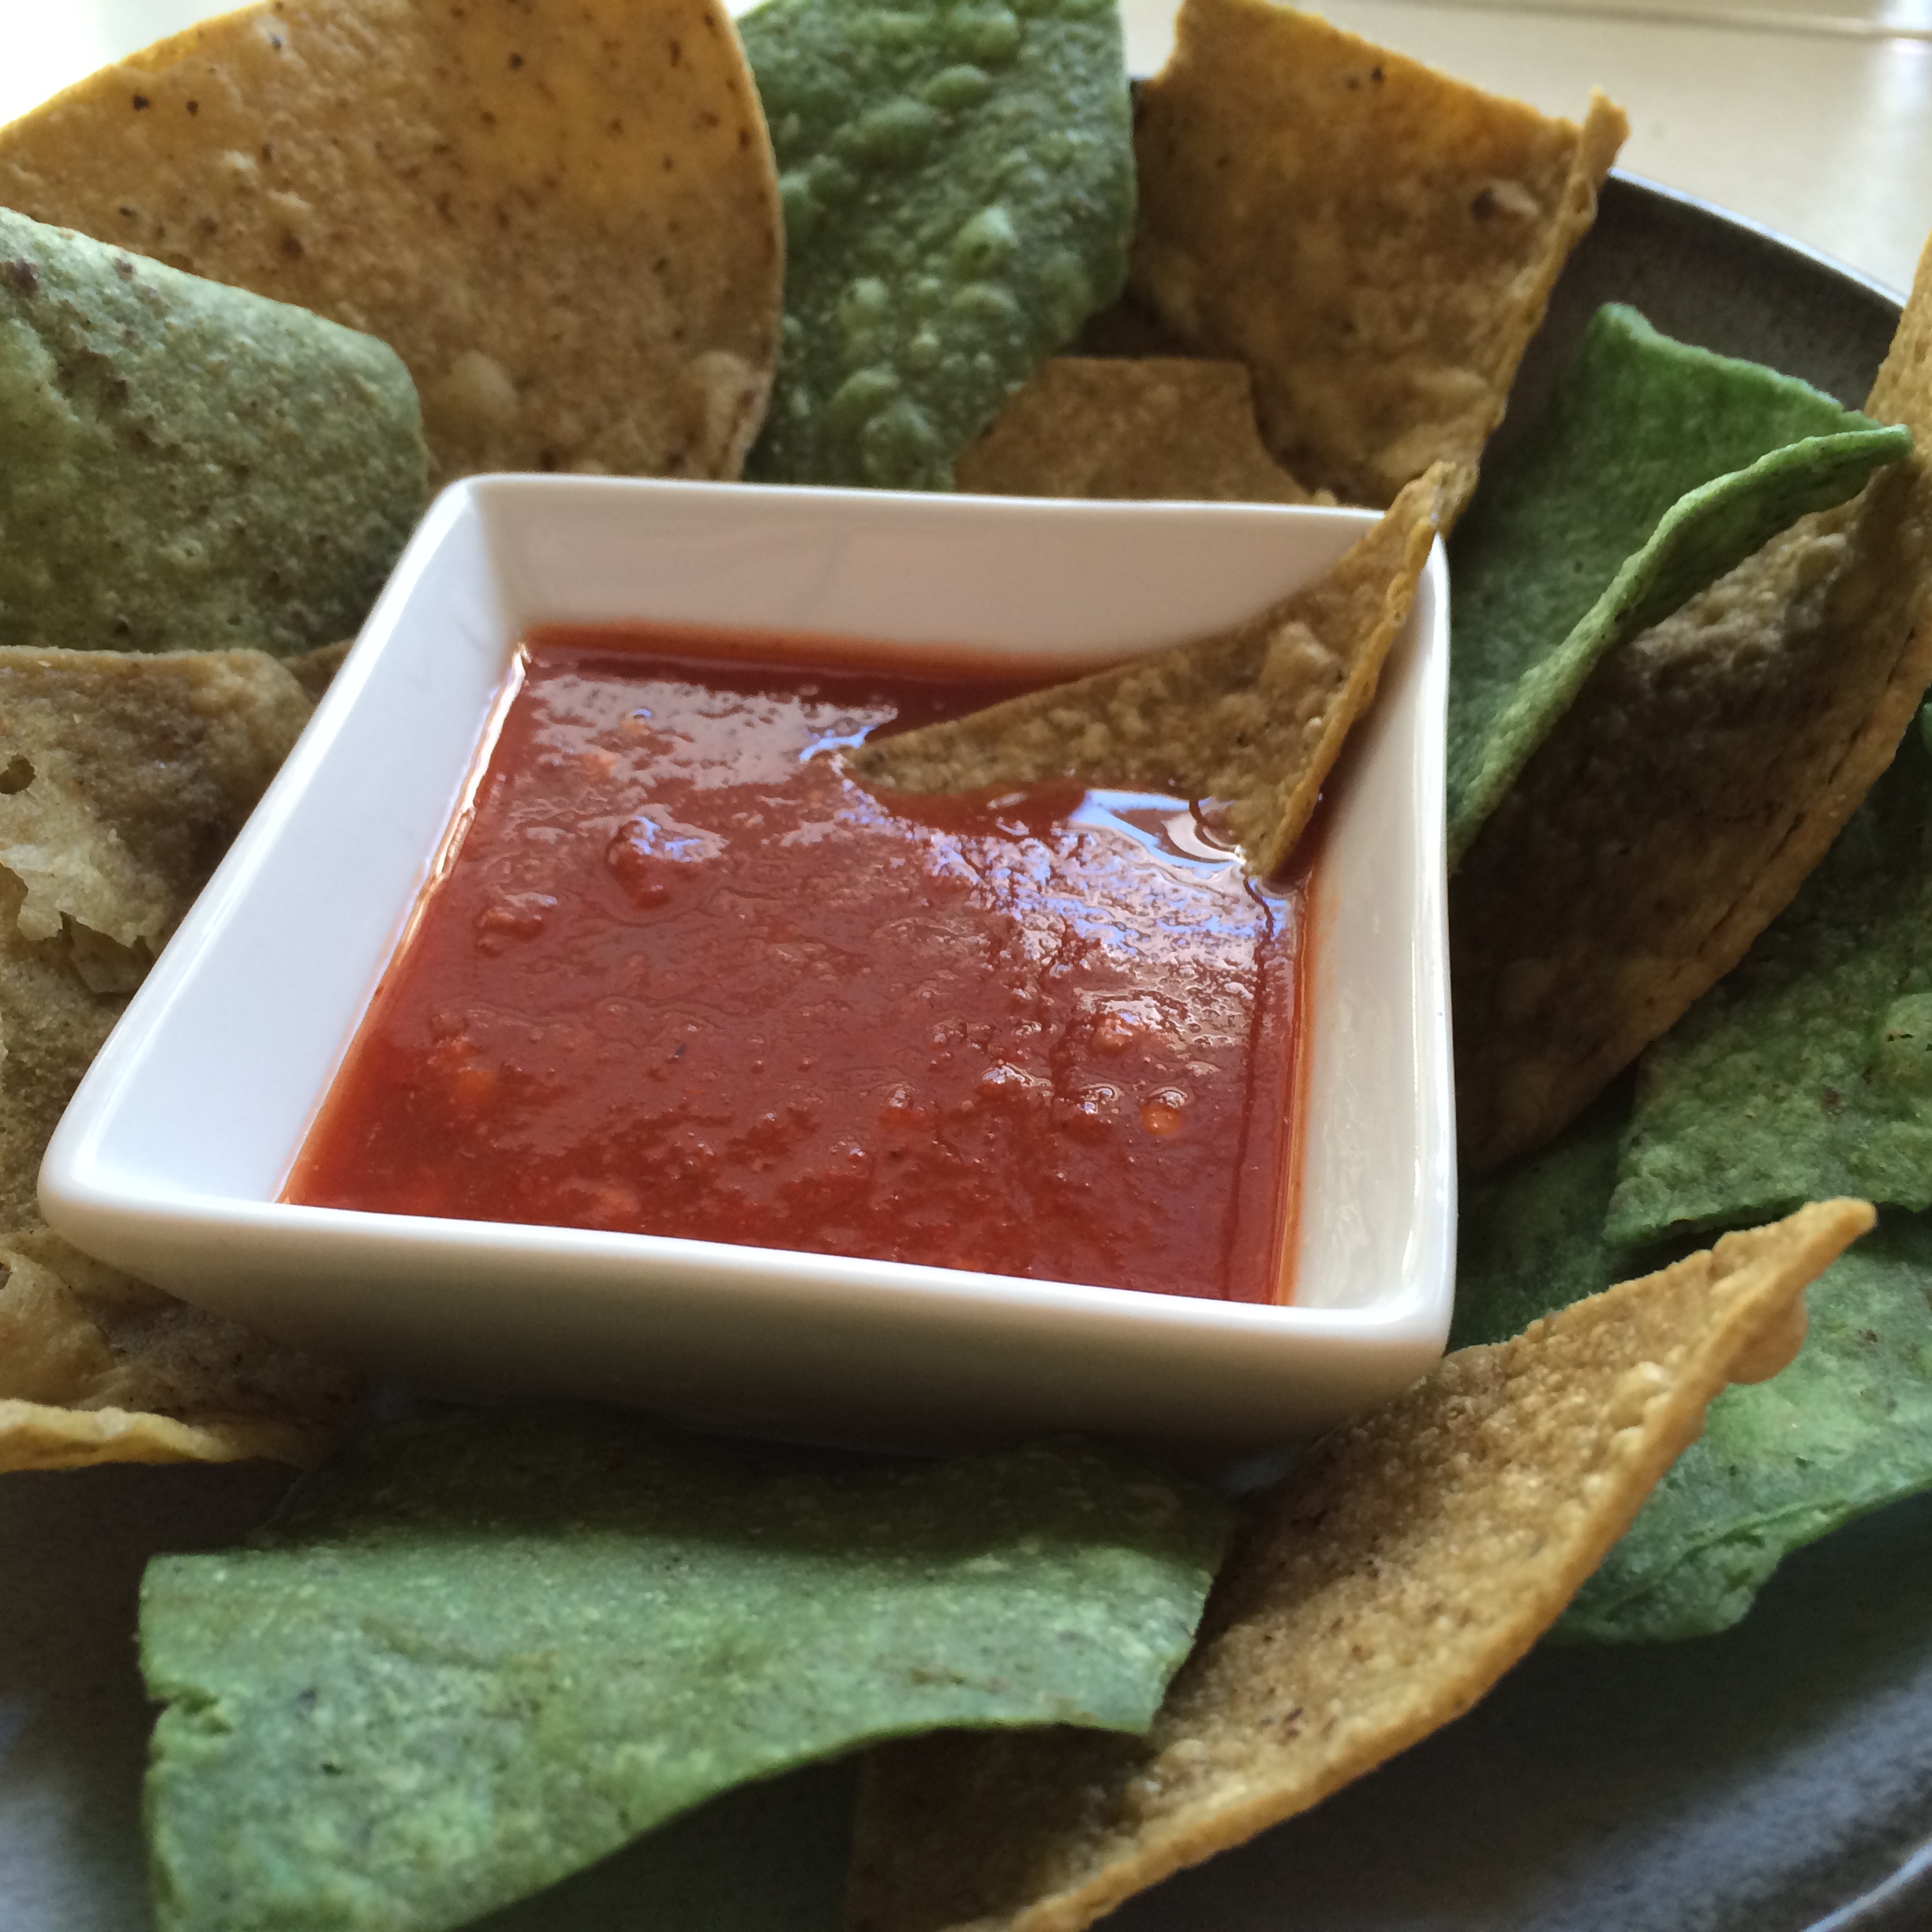
If you are really a spice fanatic, serve the salsa unstrained and you can eat with chips, but I think most will enjoy this as a garnish on tacos, quesadillas, chili, even a dollop in their soup if they want some kick. It’s sure to become your new favorite hot sauce.

Nom, with sizzle, on,

~Crunchy

Cream cheese sopapilla: Cinnamon-sugar perfection

So I got all ambitious and bought LOADS of cream cheese a couple weeks ago thinking I’d attempt a cheesecake. And it sits there. And it sits there. And it sits there. I’m getting desperate. I need to use this stuff but I just don’t have time to make a cheesecake. Gak! After endless searching I stumble on this adorable little confection. It’s got sugar and spice and its handheld (a theme with me) and …. cream cheese! Yes. The process was still a bit time consuming, but man are these little suckers GOOD. I have had a hard time staying away from them they are so freaking good, and I don’t have a sweet tooth. No doubt they will tickle yours!

Cream Cheese Sopapillas

Ingredients

Filling

  • 1/2 pkg (4 oz) light cream cheese
  • 1/4 cup sugar
  • 1/2 tsp vanilla

Crust

  • 1 pkg refrigerated pie crusts
  • 2 tbsp butter, melted
  • 1/4 cup sugar
  • 1 tsp cinnamon
  • 2 inch round biscuit cutter, or small juice glass

Preparation

  • Set the cream cheese out to begin softening.
  • Sprinkle flour on your board or cutting surface. Roll out crusts and cut out as many 2 inch rounds as you can. I had to combine and re-roll a few times. You should get about 24 rounds. Pop them in the fridge to keep cool.
  • Once the rounds are done and the cheese has softened, combine the filling ingredients and blend with a hand blender until smooth and soft. Use a rubber spatula to transfer to a sandwich baggie. Set aside.
  • Pre-heat oven to 350.
  • Line two cookie sheets with parchment paper and lay out 12 crust rounds.
  • Snip the end off your filling baggie and pipe a small amount of filling onto each round.
  • Top the filling with the remaining 12 crust rounds. Using a fork, press along the edges of each pie to seal the crust layers together.
  • Bake at 350 degrees for 12-14 minutes.
  • In the meantime,
    • combine sugar and cinnamon in a shallow bowl. Set aside.
    • melt your butter in a bowl. Set aside.

When ready, let the pies cool just slightly.

  • Coat the tops of your pies.
  • Either dunk and cover your pies in the sugar mixture, or sprinkle over the tops. It just depends on how sweet you want them to be.

Depending on when you serve them, they go great with fresh berries and a vanilla latte. Or you can just guilty pluck one out of the fridge every time you go in the kitchen. I hear tell the calories don’t count if no one sees you eat it.

Nom On, 

~Crunchy

Shout out: Although my version tastes more like a mildly sweet tart, I did want to give credit to the clever baker who created this variation of the traditional sopapilla: http://www.crazyforcrust.com/2013/04/sopapilla-cheesecake-hand-pies/

Mango-Habanero Salsa

Ah, the mango-habanero marriage. Bright, fresh heat that bursts through your mouth and nose like the sun warms your skin when you turn your face up to it. Yeah; yeah I am being poetic because what’s happening when you mix orange habenero peppers with ripe mango is f**king amazing. Throw in some pineapple, cilantro, lime juice, and red onion….dear god.

So, how do you get that action? I love a good salsa, so let’s start there.

Mango-Habanero Salsa

Mango-Habanero Salsa

Special Equipment

  • Blender or Food Processor

Ingredients

  • 1 medium tomato, chopped
  • 2 habanero peppers, chopped
  • 2 tablespoons cilantro, chopped
  • 1 small, ripe mango, chopped
  • 1/2 cup chopped, red onion
  • Juice from 1 lime
  • Salt to taste

Preparation

  • Set out your blender or food processor and add all of the ingredients to it.
  • Depending on how you like your salsa (chunky or smooth) process it until you are happy with the texture.
  • Transfer to a bowl or Tupperware and refrigerate for at least 2 hours.

Ok, I have salsa, so now what?

Well, my friend, I will list the pairings in order of raddness with this salsa.

  • Shrimp
  • White, mild fish
  • Shredded chicken
  • Shredded pork
  • Diced chicken
  • Diced pork

You can also just scoop it up with chips and make the magic happen that way.

But what would be the ideal recipe for this?

Pineapple and Shrimp Street Tacos

Ingredients

  • 1 pound fresh shrimp – de-shelled and tails removed
  • 1 8oz can diced pineapple chunks, drained
  • 1 medium vadalia or other sweet onion, chopped into large chunks
  • Chopped cilantro
  • Extra virgin olive oil or Grapeseed oil
  • Corn Tortillas
  • Salt and pepper

Preparation

  • You can either use a standard outdoor grill, an electric grill, or a cast iron stove top grill, depending on what you have available.
  • Brush oil all over your ingredients, except cilantro. Season with a dusting of salt, and then pepper.
  • With a paper towel, rub a little oil on your grill space if you are using an electric or cast iron stove top grill.
  • Once your grill is hot, spread your ingredients, except cilantro, on the grill and cook for approximately 3 minutes per side. The goal is to lightly char the veggies and cook the shrimp until it is translucent.
  • While your fillings are cooking, heat up your tortillas over an open burner on your stove. Store them in a tortilla warmer until you are finished heating them all up.

Pineapple and Shrimp Skewers

  • The prep is almost identical, but for ingredients, buy pineapple rings and chop them in larger chunks, in some cherry tomatoes, and cut the sweet onion into large chunks.
  • Thread on a wood skewer soaked in water or a metal skewer and brush with olive oil. You can sprinkle salt and pepper, too, if you like.
  • Heat on your grill for about 3 minutes per side to char the veggies and get the shrimp translucent.

If you want a really light dish, just serve each person two tacos (or skewers) with the salsa spread over them and sprinkled with cilantro. If you need some starch to keep you full, I recommend a plain rice, like basmati, with a little butter and salt. You have so much flavor, just don’t make a starchy side with loads of spice to compete with your main course.

Nom On,

~Crunchy