Pizza Crust: Surprisingly hard, until it’s not.

I’ve been making pizza in one form or fashion for years. My first job was actually making pies at Round Table Pizza, so I felt like I knew what I was doing when my kid asked me for pizza a couple weeks ago. No problem, I thought, I’ll even go back to my roots and pick a pizza screen instead of using my beat up old baking sheet from IKEA.

And then the problems started. The first crust was fused to my pizza screen. More research. My second crust kept snapping back and wouldn’t stick to the parchment paper. More research. My third crust was unevenly distributed so it was undercooked in the middle. More research. And, finally, FINALLY, I nailed the bake. Jesus.

Pizza Crust

Special Equipment

  • Parchment Paper
  • Pizza Screen
  • Rolling Pin
    • *Note: I tried twice to stretch this dough with my hands. You know when I started to make progress with my bakes? When I started using my rolling pin. Don’t be a hero.

Ingredients

  • Extra Virgin Olive Oil (EVOO)
  • All Purpose Flour
  • Store-bought dough
    • *Note: This post is about baking technique, but if you want to make your pizza dough from scratch, here’s the recipe I use.

Preparation

  • Drizzle 1 tbsp EVOO into a bowl.
  • Remove your dough from the package and plop (yes, that’s a technical term) into the oiled bowl. Roll it around to get your dough-baby nice and lubed up (also a technical term, just probably not this industry.)
  • Cover the bowl in plastic and let the dough rest at room temperature for no less than 30 minutes. Ideally an hour. Pour a glass of lovely, watch your stories. Relax. Everyone will eat … eventually.
  • Preheat your oven to 500 degrees.
    • *Note: If you have a convection oven, use the 450 degree setting with the convection fan on.
    • *Another Note: You can pre-heat earlier if you want, I just live in a warm climate so heating up my house is not rad.
  • Once the dough has rested, pour another glass – it’s ok, we know you finished the first one, gah-head – and sprinkle all purpose flour all over the counter.
  • Plop your dough onto the counter.
  • Sprinkle your spouse-wrangler, :::cough:::, rolling pin with flour as well.
  • Roll your dough out into approximately a 12-inch circle.
    • *Note: This isn’t your drafting class. Don’t focus on shape, focus on an even thickness of the rolled-out dough. About 3/4 of an inch will do.
  • Poke your dough with a fork in a few spots to prevent it from puffing up.
    • *Alert!: Do NOT do this step with your dough on the screen.
  • Spray your pizza screen with non-stick and cover with a piece of parchment paper.
  • Slide your rolled out dough on the screen.
  • Bake for 6 minutes.
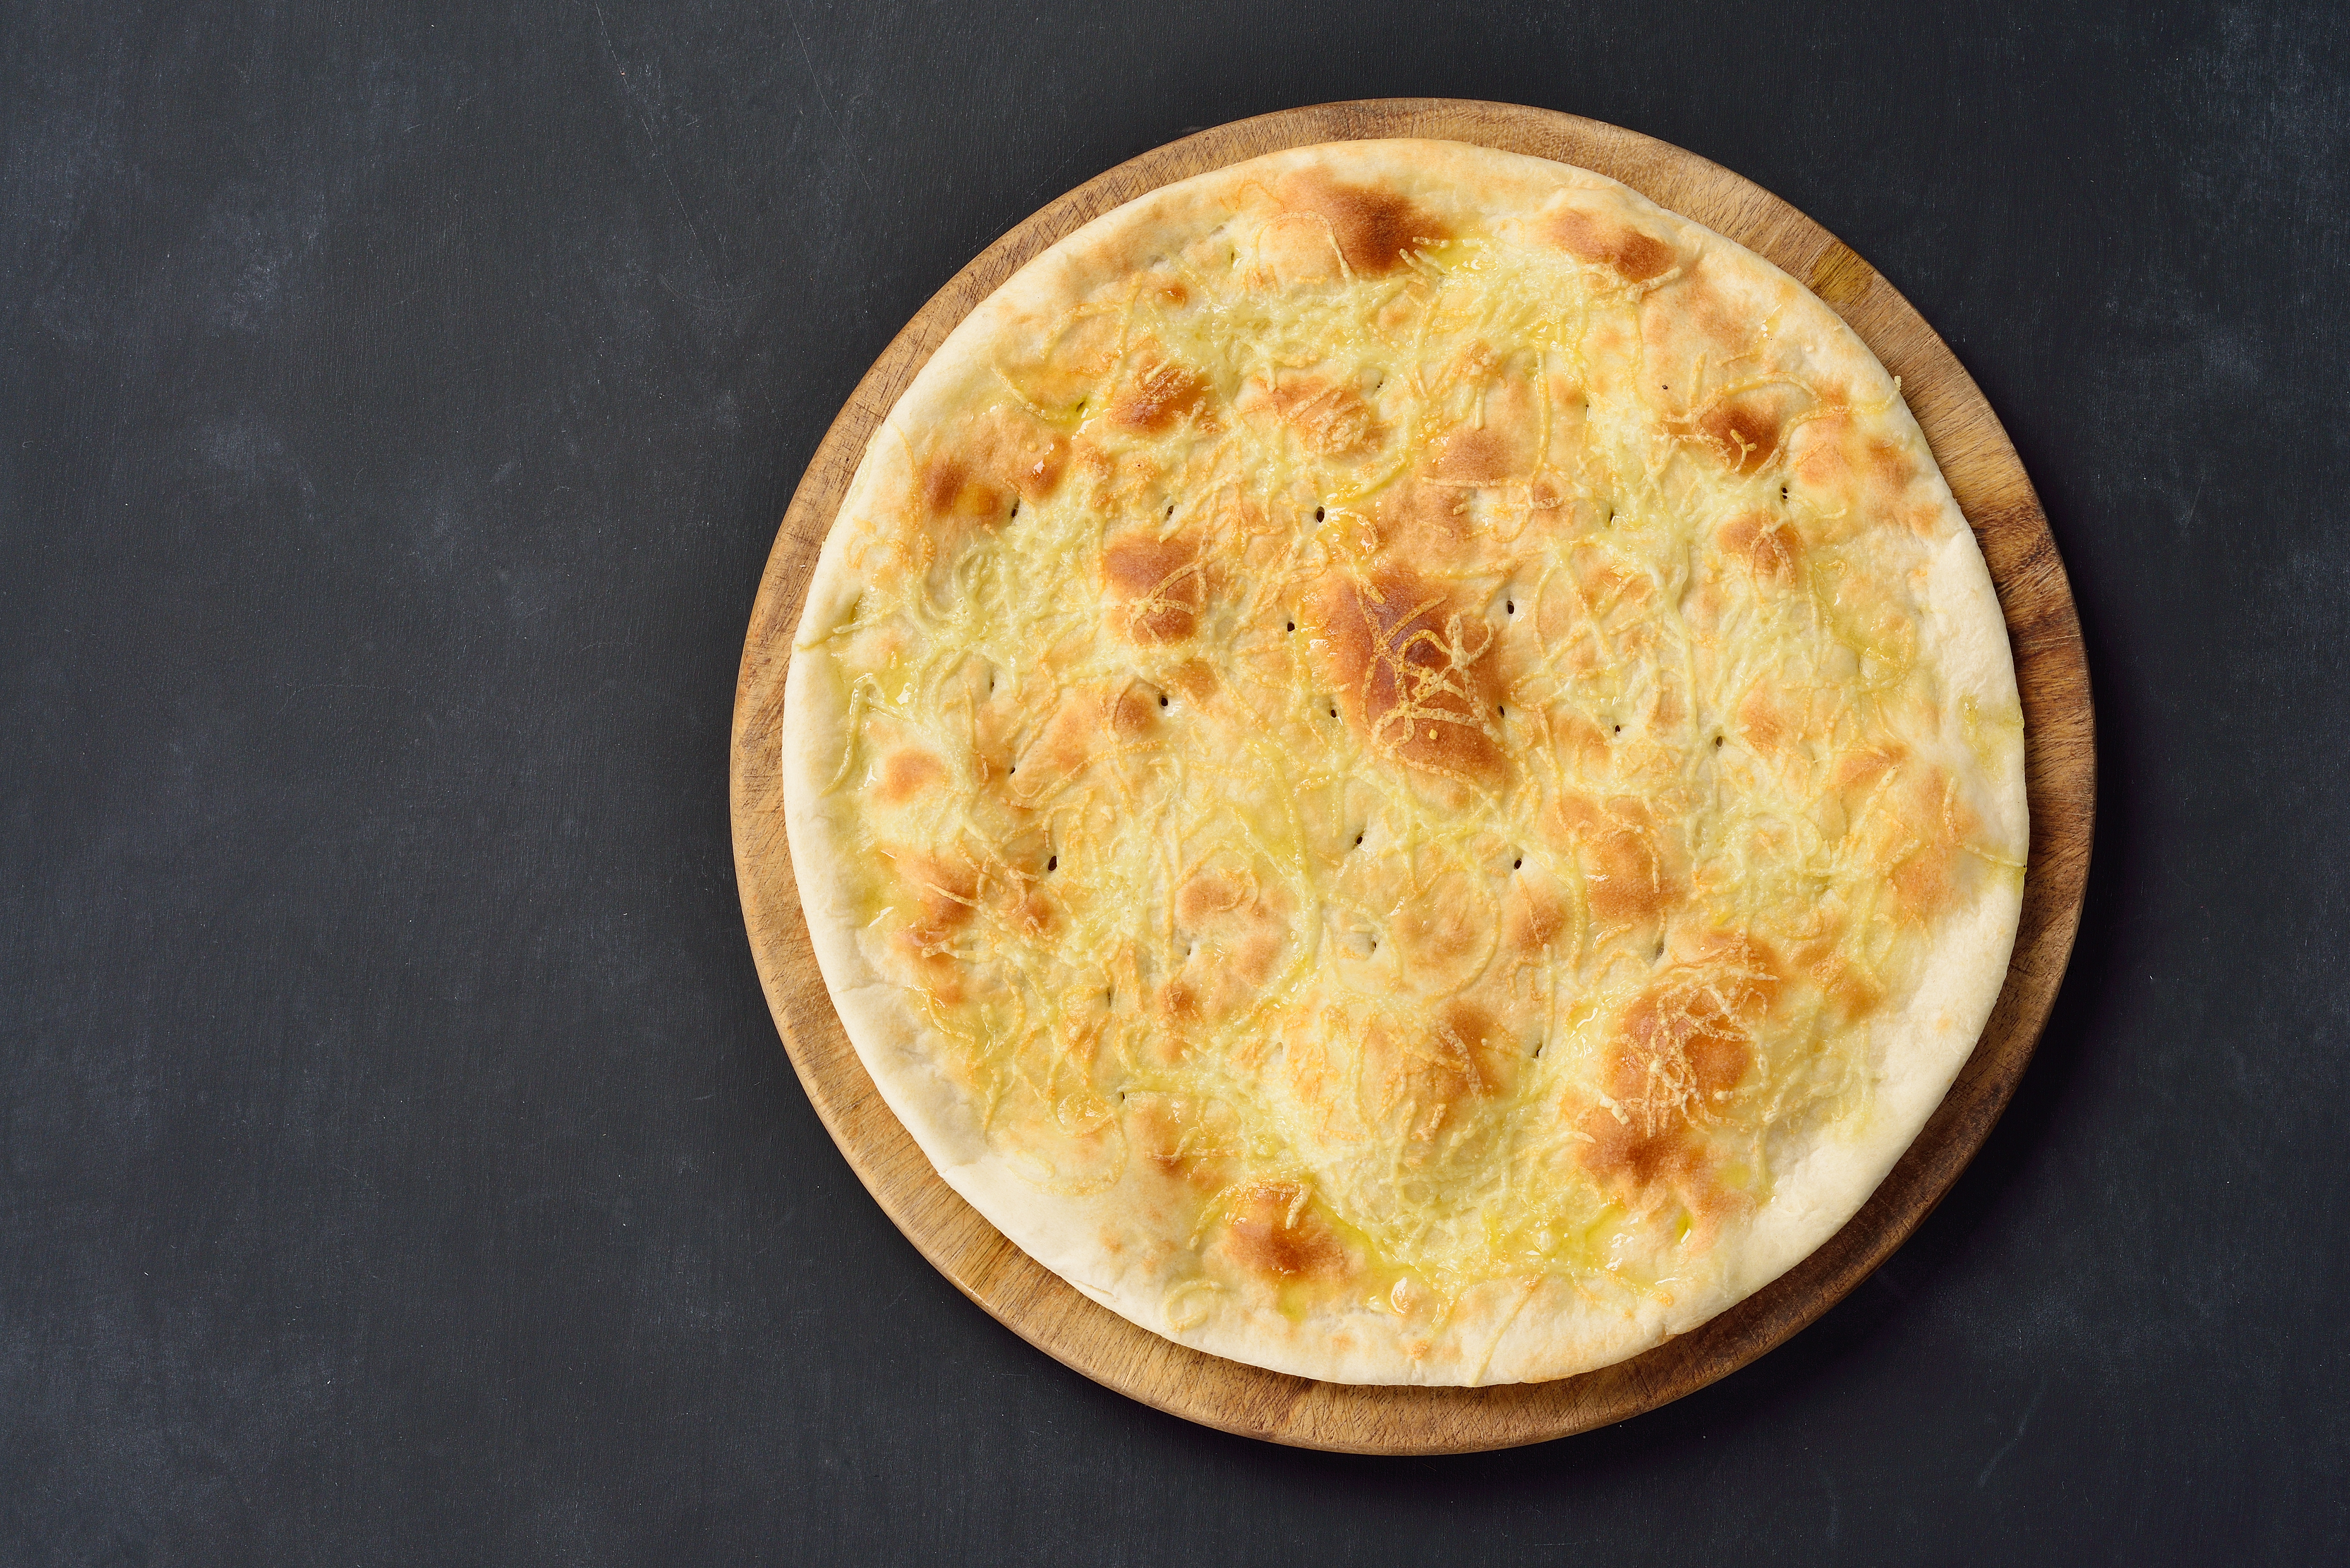
  • Once the par-bake is complete you are ready to move on to the next step, pizza brilliance.
  • Slide the parchment paper out from under the crust, brush it with EVOO, cheese, sauce, top with ingredients, and slide that bad boy back in the oven for 12 minutes.

If you can nail the crust, I promise you that the rest is easy. You have a blank canvas awaiting your benevolence, or your revenge, depending on whether the chores were done without you nagging.

Nom On, Vino Goddess. You’ve got this.

~Crunchy

The Versatile Crepe: France’s anathema for anxiety

I’ve been making crepes for many years and for some reason I have hesitated to write this blog post. I think my ‘piece de resistance’ was the year I made crepes stuffed with Rosemary Turkey Breast, smothered with Sherry Shallot Gravy and drizzled with Cranberry Coulis. The crepe, while a delightful pain in the ass to make, is at once both humble and elegant.

But, Crunchy, why would you call it an anathema for anxiety? That seems a little …. I don’t know … bombastic? A Hyperbole? Grandiose? Well, my love of my thesaurus aside, I’m not wrong. No matter how cranky and anxious I’m feeling, 45 minutes of highly focused, yet surprisingly ‘chillaxy’ ladling and swirling later, I hate the human race at least 40% less. The end result is a tangible batch of perfect crepes ready to be stuffed, folded, drizzled, and smothered in any number of other delicious and decadent ingredients.

The Versatile Crepe

Equipment:

Ingredients:

*Don’t be Cheap! Alert: The French live and die by the care, quality, and technique that goes into … well, just about everything they do. You will commonly find French recipes to have very few ingredients because every one of them count. For the Milk, please go organic. For the eggs, free-range organic. For the salt, it needs to be kosher. Finally, for the butter, choose a high-quality brand. Just do the best you can and remember that the money you spend on the ingredients will make a huge difference in the quality of your end result.

  • 420 ml or 1 3/4 cups Whole Milk. Reserve an additional 1/2 cup in case your batter becomes too thick. You may need to add a little more as needed.
  • 4 Large Eggs
  • 1/2 tsp Kosher Salt
  • 190 g or 1 1/2 cups All Purpose Flour
  • 1 Stick Unsalted Butter. Melt 6 Tbsps of butter for the crepe batter. Reserve the remaining 2 tbsps from the butter stick for greasing your pan.

Preparation:

As I have mentioned, I have made crepes many, many times. I distilled the essentials of the batter preparation in the order that you need to construct it, and it goes like this:

  • Milk, Eggs, Salt. Blend.
  • Flour. Blend.
  • Melted Butter. Blend.
  • Shove blender carafe into refrigerator for 60 minutes.

And now to let all your worries swirl away for 30 minutes:

  • Heat your crepe pan on low heat. You don’t want your crepes to burn so I suggest about a level 2.
  • Drop a sprinkle of water. If it sizzles you are ready to party.
  • Take your remaining 2 Tbsps of butter and grease a piece of paper towel.
  • Gently coat your crepe pan with the buttered paper towel. (Don’t be Lazy! Alert: If you just grease your pan with the stick of butter you will end up with too much and it will result in over caramelization.)
  • Quickly dip your soup ladle into the batter and pour a circle that covers 3/4s of the pan.
  • Immediately pick the pan up and rotate it in gentle circles, allowing the batter to spread and thin out to the outer edges of the pan. If you end up with any little holes you can dribble a little additional batter there.
  • The crepe will take less than a minute to cook. You are looking for the edges to just start to dry up. I like to gently test if I can slide my spatula underneath the crepe after about 30 seconds.
  • Flip the crepe over. Don’t be alarmed if you need to help it out a little with your hands. They are difficult to flip so don’t think of it like a pancake. I usually have to help the little dude out by readjusting it. Cook the second side for about 15 seconds.
  • Slide it onto a waiting plate.
  • Repeat the cycle for another blissful 30 minutes.

*Don’t be Distracted! Alert: Unless someone is bleeding or on fire and there isn’t another individual in the house who isn’t bleeding or on fire also that can deal with that situation, this is all you are going to be doing. Period. It’s just you, a heated crepe pan, carefully pouring, swirling, delicately flipping, sliding onto a plate. Repeat. Repeat. Repeat.

“Wait, why was I having a bad day again?” You’re welcome.

Ummm, What Should my Crepes Look like?
If you want to make a traditional crepe, it should be very thin and pale as the driven snow. Ok, maybe not the snow, but you get the idea. The reality is, butter browns. If your crepes have some color on them, fear not. They will still be delicious, I promise. But as you work your way through your batch, that is what you are looking for.

Nom On,

~Crunchy

Juicy Baked Pork Chops: Perfectly spiced and everything nice

You know how it is. You see that package of pork chops on sale and you’re like, ‘Oh, Dang! That’s a good deal! I can feed the 5th battalion with that! Word.’ And so you buy it and stick in the fridge and some days go by. You open the refrigerator door several times a day and those pork chops stare at you. And then, they start editorializing. ‘You know we are going to go bad soon, right?’ ‘SLAM!’ The next day … ‘You know you didn’t save any money if you just end up throwing us away, right?’ ‘Huff! SLAM!’

And then it gets really sad, because you start having a conversation with the hecklers. ‘We’re still here.’ You can’t take the pressure any more so you yell back, you know, at the pork. “The 5th battalion isn’t coming. I don’t even have a phone number! It’s just that thing you tell yourself when meat goes on sale!’

Well, fellow travelers. Here’s how to snatch those chops from the pearly gates and make something glorious.

Spiced Pork Chops

Equipment

  • 9X13 Inch Glass Baking Dish

Ingredients

  • 6 boneless pork chops
  • Extra Virgin Olive Oil (EVOO)
  • Salt
  • Pepper
  • Cayenne Pepper
  • Crushed Red Pepper
  • Ground Cinnamon

Preparation

  • Preheat the oven to 400 degrees.
  • Coat a 9X13 inch glass baking dish with EVOO.
  • Place pork chops in the baking dish.
    • *Note: The pork needs to fit snuggly together to tenderize and conserve juices. If there is too much space between the chops, use a smaller baking dish.

Now, for the fun:

  • For my recipe I used EVOO liberally, salt, pepper, cayenne, crushed red pepper, and cinnamon. I measured nothing. It was all on a wing and a prayer and, lord have mercy did it turn out amazing.
  • Now that you have had fun bedazzling both sides of your pork chop and you have made sure they are all snugly tucked together, your oven should be ready!
  • Pop them in on the middle rack for 16-18 minutes, uncovered. You want to reach an internal temperature of 145. Let the pork rest for about 5 minutes.

That’s it. Seriously. 10 minutes of prep, 20 minutes of cooking while you pound pinot grigio and spoil your appetite, and dinner is ready.

Is this a main dish or a base recipe?

Both.

This pork turned out juicy, complex, and delicate all at the same time. So if you want, just pair it with a starch and a green and ring the chow bell.

Or, because my rub is spicy, with a hint of ‘what the hell?’ due to the cinnamon, you can lean in for a little Caribbean-inspired fusion. I made a pork-mango salad for the spousal unit, but you whip up a batch of habanero-mango salsa and …. swaying to calypsos, baby.

So there you have it, fellow travellers, on-sale pork redemption.

Nom on,

~Crunchy

A Whole Chicken and Hard Choices: A soliloquy on the value of social networks

You’ve seen ’em sitting there, wrapped in that ubiquitous yellow and blue bag, in the meat section: A Whole Chicken. Is that a thing? I mean, I can buy the individual pieces parts and toss them in the skillet and be done with it, or whatever. You’re curious so you look at the price tag. Wait. Why is a pair of chicken breast cutlets twice the price of a whole chicken? I confused. Still, it’s intimidatingly large and you only ponder a whole bird for thanksgiving so….let’s move on…

As it turns out, cooking a whole chicken is something a one handed chimp can do. It’s not just a way to economize, if you don’t need to, but it’s a way to make something delicious in it’s simplicity and be a basis for making other really delicious food that is unparalleled in quality and flavor, because all the best flavor come from freshness. Allow me to free you from the overpriced precut meat, readers, unless you have a real need for fillets.

Boiling a whole chicken does take a fair amount of time, so first, let’s get that bad boy on the stove, and then I will tell you a story.

Get yourself a big pot. You know the one I am talking about. It comes with all basic cookware sets and most people just shove it in the back of the cupboard and store their lids in it. Yeah, go get that thing out. Next, take the whole chicken out of the bag and pull the neck out of the cavity. That’s the one nasty part. You’ll want to give the chicken a good rinsing off to clear out the collected juices. Rinse the cavity out, too. Put the chicken in the pot and then add enough water to completely cover the chicken.

Now, for the next bit, this is personal preference because you will be making stock as well. If you like the stock very plain or want to use it in a recipe that will be adding spices and such to a sauce, I recommend you just quarter a big, yellow onion and pop it in there along with a tablespoon of peppercorn. If you want a little more flavor you can add chopped celery, carrots, a sprig of Thyme. That’s a nice route if you want to use the stock for chicken soup. If you want to add garlic, just take a head, cut it in half, and place the half in the pot that is held together by the stem.

Ok, now you need to turn the flame on high and bring your water to a boil. Once you have it rolling, reduce the heat down low enough to maintain a gentle boil. Make sure you set the lid ajar so the steam can escape.

IMG_1561

Now for the story. When I was 18 I followed my boyfriend at the time to Minnesota. I have not had a very close relationship with my family, so the decision didn’t seem like a big deal. I do have wanderlust, so it felt like an adventure. The reality was something else entirely and it made me understand something I had to move 2000 miles away to appreciate: Social Network. We babble about this as a website or a way to ‘stay in touch.’ Friends, that is not what a social network is. A social network is having people close to you, who GIVE ENOUGH OF A SHIT ABOUT YOU to pick up the phone and drop what they are doing to come help you when you need them.

I locked my keys in my car one day, when I was working in Edan Prarie and it was over an hour away from Brooklyn Park, where I resided. I tried calling the boyfriend but he didn’t answer. I tried calling the ONE friend I had, Chris Marteness, but his mom didn’t know who I was and refused to help me get ahold of him at work and hung up on me. I tried to ask the one co-worker left in the office for help, but she thought I was a snooty Californian and found it funny that I was verily stranded. I managed to get the back window of the shell top open and climbed inside the back of the truck. It was raining out and I just sat there, shivering. I was hungry, and tired, and just, alone. Not alone in my head, like I often think I am, but truly realizing what that means.

After a spell, I crawled out of the truck bed and went back into the office. The last thing I could think of was, maybe the police? I finally got lucky. An officer came out and used a slim Jim to open my door. That’s not something a cop will do for you in Cali, that’s for sure. I was so grateful and relieved. When I got home I asked douche bag, uh, I mean the boyfriend, why he didn’t answer the phone when I called a million times? Turns out he just shut off the ringer because the noise was disturbing his slumber. No, hadn’t bothered to listen to my frantic messages on the answering machine either. Anyway, I was home now, so what’s the big deal? He was going back to sleep.

It’s a simple example, but I know that today I have about 20 people I could call on for help, any kind of help, and they would be there for me. My heart felt thanks to the warmth, and laughter, and shared misery of modern life to you all and it is my pleasure and honor to be there for you if you ever need me. As I watch my daughter grow and thrive in the sunlight of your affection, I can honestly say, I get it now. But also I am going to shop for a pocket slim Jim, just in case.

So, its been about 90 minutes. Let’s check on the chicken. Mmmm….that’s perfect. Falling off the bone.

IMG_1559

All you need to do now is remove the chicken from the pot and prep it. You can serve it whole on a plater and go at it cave man style, shred it for salads and soups, or slice it for sandwiches. The stock, depending on how you prepped it, can either be used as a base for chicken noodle soup, to boil veggies and noodles to serve with the chicken, or as a base for a sauce like Mole.

So there you have it. Chicken and a story. Not as good as dinner and a show, but not a kick in the nuts either.

Nom On,

~Crunchy

Mole, Demystified

Until a year ago mole was this dish I’d heard mentioned a few times, always with a certain amount of reverence from my Mexican friends and family. Considering my Latin Cuisine savvy didn’t get much further than some form of meat, beans, and salsa intersecting with tortillas, fried into some clever shape to get goods in my mouth, I wasn’t sure what the big deal was. When my daughter turned one my husband informs me with awe that the little princesa will have mole made from scratch for her party. I am a spicy food addict so when I tried it, I remember mostly being confused. I wasn’t sure what I was tasting exactly, it wasn’t sweet, it wasn’t savory, it wasn’t spicy. It was just … mole. Weird.

I forgot all about it until a few weeks ago when my salsa lady at the farmers market asks if I want to sample her mole. There’s that word again. Sure, I say, and imagine my surprise when she hands me a jar of … what I can only describe as goop. She proceeds to explain how to use it to make a sauce and off I go, more than a little freaked out. And now, after much research and experimentation I bring to you the simple, cheater-cheater-pumpkin-eater way to make both dark and green mole.

 Mole Negro Sauce

Ingredients 

  • 2 – 3 heaping tbsp of dark mole paste, depending on how thick you want the sauce
  • 2  cups chicken broth
  • 1 tsp cayenne pepper
  • Salt and pepper to taste
  • 2 disks Mexican chocolate
  • 1/2 cup almond butter

Preparation

  • Add 2 cups of broth to the blender. Add the dark mole paste, almond butter, cayenne pepper, 1/4 tsp salt, and 1/8 tsp pepper to the blender as well. Break up the chocolate and add into the blender. Blend ingredients until you have a smooth sauce.
  • In a medium-sized pot add the mole sauce. Simmer on low for about 20-30 minutes, stirring occasionally. 
  • While the sauce is thickening and simmering, slice a red onion into thin rings. Cut the rings in half once. Put them in a bowl and squeeze one whole lemon and stir to coat. They need to marinate for about 30 minutes. 

Mole Verde Sauce

Ingredients 

  • 4 cups of chicken stock
  • 2 – 3 heaping tbsp of green mole paste, depending on how thick you want the sauce
  • 1 pd tomatillos, husks removed
  • Peppers:
    • Mild: 1 chopped passila
    • Medium: 2 chopped jalapenos
    • Hot: 2 chopped serranos
  • salt and pepper to taste

Preparation

  • In a large stock pot, add your husked tomatillos, cover with broth, and boil for 20 minutes, until soft. 
  • Add to the blender:
    • Tomatillos
    • 2 cups of the broth from the stock pot
    • 2-3 heaping tablespoons of green mole paste
    • Chopped peppers
  • Blend ingredients until you have a smooth sauce.
  • In a medium-sized pot, add the mole sauce. Simmer on low for about 20-30 minutes, stirring occasionally. 
  • While the sauce is thickening and simmering, slice a red onion into thin rings. Cut the rings in half once. Put them in a bowl and squeeze one whole lemon and stir to coat. They need to marinate for about 30 minutes. 

Notes: 

  • Traditionally, mole is served drenching a chicken quarter. Add Spanish rice and warn corn tortillas on the side with picked red onion and cilantro to garnish. You can also mix your shredded chicken into the sauce during the simmering period and use it in your favorite Mexican entree: Tacos, burritos, quesadillas…
  • Can I plus this? You know you can! Poach your own chicken breasts to create the stock for your sauce and use that instead of store bought broth.
  • Note a fan of chicken? That’s ok! Add cubed steak into the sauce during the simmering period instead, and sub the chicken broth for beef broth.  
  • If you want to get a little creative, you can actually use the green or dark mole sauce to make enchiladas. Just make your casserole as usual but your mole sauce is substituted for ranchera sauce. For dark mole, I would use a smokier cheese like gouda and for the green mole I would use pepper jack.

So there you have it folks, mole demystified. The process of making the mole paste from scratch is insane and, from what I am told, is something that even the most accomplished Mexican home cooks don’t bother with more than a few times in their life. Now I know why it was a great honor that my mother-in-law made mole poblano from scratch for her reina pequena.

Nom On,

~Crunchy

Bruschetta Salsa

A staple starter in pretty much every Italian eatery, and most bar and grilles, I think bruschetta get’s over looked. It’s also really easy to make an utterly underwhelming batch; just use off-season tomatoes and dried basil instead of fresh and you will be one sad Mac. Here’s how to make it right, and then you can put it on everything!

Bruschetta Salsa

Ingredients

As a general note, you should shop for all your fresh ingredients at the farmers market for this dish. Good bruschetta hinges entirely on how vibrant the produce and herbs are. Get your toms, garlic, basil, and parsley from the market the day you plan on making the salsa and choose with care.

  • 4 plum, ripe, in-season tomatoes
  • 1/2 cup shredded parmesan cheese
  • 1/4 cup fresh minced basil
  • 3 tbsp extra virgin olive oil
  • 2 tbsp fresh, minced parsley
  • 3 cloves minced garlic
  • 2 tsp balsamic vinegar
  • 1/8 tsp salt
  • 1/8 tsp pepper
  • 1/8 crushed red pepper flakes

Prep

  • Combine all your ingredients and let soak and chill in the fridge for about an hour before you serve.

If you want an elegant, low-carb snack or starter …

pick up a log of fresh mozzarella and slice into small medallions. Arrange a few large basil leaves on a plate, then 3-4 medallions. Spoon the salsa over the medallions. If you have time, make a simple balsamic reduction and drizzle a little over the dish. Magnifique!

If you want classic bruschetta toast ….

cut a fresh baguette into thick slices. Spread a little butter on each slice and toast to a medium-well. Getting the slices the right thickness and level of crispy is crucial because the salsa has oil and vinegar and it really soaks through the bread. I can’t tell you how many restaurants have blown this aspect and I am left with a soggy mess and a serious case of situational depression.

I like to add a little leaf of basil to eat slice of bread before I spoon the mixture on. It adds color and a pop of freshness, plus it helps slow the pace of the bread soaking and breaking down. If you think the toast will sit awhile because you are setting it out for a gathering, I recommend this.

Again, if you have time to make a quick balsamic reduction, drizzle this on as a finishing touch. Don’t get carried away though. It’s a strong flavor.

What else can I do with this lovely salsa?

Man, it’s almost endless. The salsa is the flavor so if you want a quick, light vegetarian entree, top off some angel hair pasta and drizzle with balsamic reduction. You can make the dish heartier with slices of grilled chicken.

If you want low-carb, grill chicken breasts or flank steak in a garlic butter and sauté some squash. Top the meat with the salsa and serve with a dollop of balsamic reduction on the side for dipping.

Want a fabulous vegetarian burger? Grill up a portabella mushroom, top with a fat slice of mozzarella cheese and the salsa. Serve on toasted wheat buns with garlic butter. Or, if you want to try something fun, make garlic bread and use two thick slices of that for your bun. Dude.

If you aren’t ready to nom on at this point, you may be hopeless!

~Crunchy

Salsa Verde

So, you like Mexican food, but maybe you are getting a little burnt out on that red tomato flavor? Enter the verde! This is a great sauce that you can use for just about any dish you would normally garnish or make with a salsa roja or ranchera sauce and get a great, new taste. It’s easy to make and way more flavorful than the crap sold in cans in the “stuff non-white people eat’ isle. Give it a try, you’ll be pleased.

Salsa Verde

Ingredients

  • 1 pound tomatillos
  • 1/2 large, white onion, chopped
  • 1-to-2 Serrano chili peppers, chopped
  • 1 garlc clove, minced
  • 3 tablespoons fresh cilantro, chopped
  • 1/2 teaspoon ground cumin
  • 1 1/2 teaspoon salt
  • 1/2 teaspoon pepper

Preparation

  • In a small sauce pan, add tomatillos, onion, peppers, and cilanto.
  • Add enough water to just cover the veggies, about 2 cups.

Salsa Verde Progress

  • Add cumin, salt, and pepper.
  • Bring to a boil and simmer for 20 minutes.
  • Using either a blender or, ideally, an immersion blender that you can stick right in the pot, puree the ingredients.
  • Taste the salsa and add a little more salt, a 1/4 teaspoon at a time until you are happy.

What can I do with my salsa verde?

This sauce is great to use for enchiladas and casseroles, especially if you are looking for an alternative to ranchera sauce. You can also garnish tacos and rellenos, or make a wet burrito by covering in a generous amount of sauce, sprinkling with jack cheese, and baking at 325 degrees for about 5 minutes. You just want the cheese to melt.

If you like to grill, you can use this sauce as a marinade for chicken or garnish on shrimp. The cumin in the sauce makes it very robust so it can stand up to any cut of steak as a garnish, too.

If you are into creative pizzas, you could use this sauce instead of tomato, add slices of cooked steak, chopped white onion, and chopped tomatoes with shredded mozzarella or jack cheese. Sprinkle with cilantro when its out of the oven. Damn, I am making myself really hungry.

Feel free to check out my recipes using salsa verde if you are looking for ideas.

Nom On,

~Crunchy