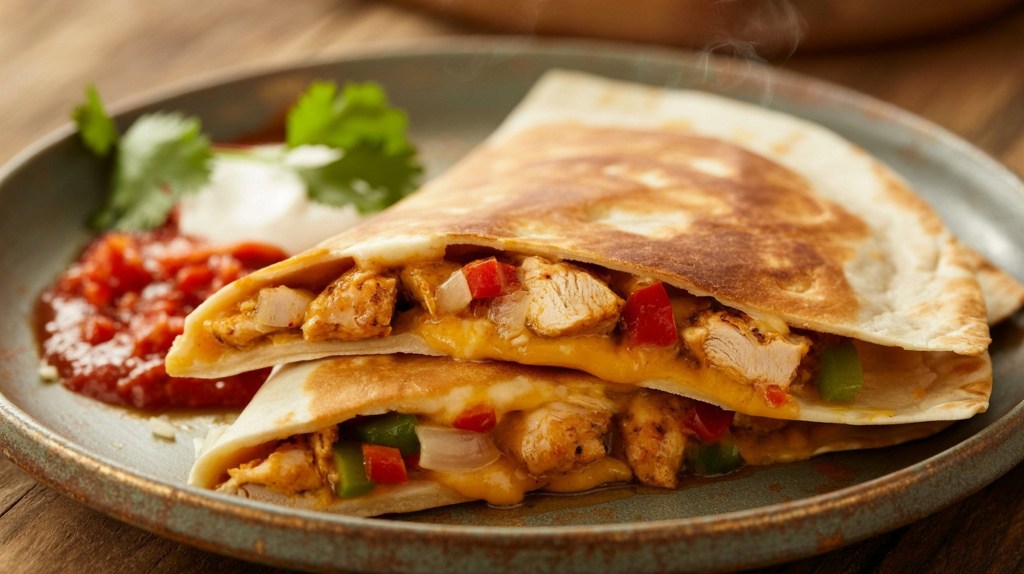
Oh lord, it’s Saturday afternoon again. The whole family is milling around, wanting lunch and a stack of sandwiches just sounds so….weekday sad. The errands are done and maybe you have a little more time to cook than usual. You look in the fridge and see a bunch of random, almost used up stuff like chicken breast, deli meat, and a couple hunks of cheese. I keep a stack of corn tortillas handy to handle Saturday afternoon, because nothing uses up leftovers and delights the palate like the quesadilla flight!
The Quesadilla Flight
Ingredients
- Cheese – any kind, seriously. You can use cream cheese, too. I find jack or mozzerlla to be the most-kid friendly, so if you have that, use it.
- Filling – empty your fridge of things like the tomato and avocado that are close to spoiling, the almost empty tub of deli meat, that lone left over chicken breast, the ubiqutous 1/2 onion … you get the idea. These all sound obvious but you can use up squash and that 1/4 jar of spaghetti sauce, too. Corn tortillas are one of the most versatile canvases ever, so don’t assume your flight has to only offer the more classic Mexican cuisine flavors.
- Corn tortillas – they are healthier, tastier, and less caloric than flour. They are also smaller in size and maximize your number of canvases to make your combos. You’ll see.
- Extra virgin olive oil
Preparation
- Thinly slice veggies or finely dice whole pieces of meat such as chicken breast or pork tenderloin. Thinly sliced or finely diced ingredients cook better in quesadillas.
- Shred your various cheeses and, depending on how compatible the flavors of the cheese, either keep them seperate or blend them. For examle, jack, cheddar, and mozzerella can be blended. Gouda usually can’t pair unless you have another nutty or smokey cheese like gruyere left over also. If you really want to up the diversity of your flights, don’t combine cheeses.
- Let the crazy begin! I just go with flavors and pairings that I know to go well together based on what I have to work with. Cheddar, ham, and tomato slices. Pepper jack, turkey, and avocado slices. Cream cheese with tomato and olives. Jack with shredded chicken, diced onion, and cilantro. If I have nutty or smokey cheeses to use up, I add thin apple slices and some sauteed onions. Some cheeses pair well with pesto or berry jams, and of course if you have left overs from spaghetti night, just do a thin smear of tomato sauce, mozzarella, ham, and olives.
- To cook the quesadillas, just put your pan over a medium-low flame and add a litte EVOO. Place the tortilla into the pan and rub around to coat. If using sauce, spreads or jams, spread that first. Then, sprinkle the cheese and then layer meat and then veggies. I let the cheese melt a little and then fold the tortilla over. You just want to cook each side to lightly brown and get the cheese gooey.
- Repeat with various combos, based on your ingredients. I generally end up with quite a variety, even in I just omit an ingredient here or there or sub another. The goal is to make a flight, so they shouldn’t all taste just the same.
- Serve with dips, lime or lemon wedges, or extra tomato slices dusted with salt and pepper. A little side salad if you have it handy.
Note: These guys get cold fast, so I am basically a short order cook. Serve as batches are ready and encourage your peeps to dig in. As Chef, you should be nomming as you cook. For this reason, I don’t make the same quesadilla twice in a row or your batches won’t be ‘flights.’
Dips to serve with my flights?
Before you warm up the griddle, you can make these easy-prep dips before you start the flights.
Quick Guacamole Dip
Ingredients
- 2-3 Ripe avocados, cubed
- 1 or 2 Roma tomatoes, chopped
- 1/2 Red onion, coarsely chopped
- 2 to 3 Garlic cloves, roughly diced
- Fresh squeezed juice from 1 to 1 1/2 Limes
- Salt and pepper, to taste
- Ground cayenne, to taste
- Cilantro, ripped or roughly chopped
Preparation
- With a fork, mash and stir the avocado. You can leave it a little chunky; it’ll get smooth as you mix in your spices.
- Fold in the tomato, onion, diced garlic and stir.
- Squeeze in the lime juice and stir.
- Add in about 1/4 tsp of salt and 1/8 tsp black pepper. Stir and taste.
- Add in a few shakes of cayenne. Stir and taste.
- If your guacamole seems bland, you can add in a little more salt or cayenne, but don’t go too crazy. Ground spices are more potent than freshly chopped peppers so the taste changes quickly.
- Cover with plastic and chill for 30 minutes.
- When you serve, sprinkle a little cilantro on top.
Spiced Sour Cream Dip
Ingredients
- 1 tbsp olive oil
- 1/2 cup yellow onion, chopped
- 1 cup sour cream
- Salt and pepper, to taste
- Ground cayenne, to taste
Preparation
- In a small pan, heat up a tablespoon of olive oil.
- Add in a half cup of chopped yellow onion and sauté until they are clear and soft.
- In a small bowl, mix 1 cup of sour cream with a pinch of salt and a pinch of cayenne or black pepper.
- Fold in the sautéed onion.
- Cover and chill for 20 minutes.
Doldrums be gone, and Nom On!
~Crunchy